This post will teach you how to uninstall Dropbox, so you can make room for the reinstallation of a newer version of the program or free up space for the installation of other cloud storage applications. This article is a comprehensive guide on how to properly uninstall Dropbox so that no leftover files occupy disk space.
However, it’s important to note that the complete removal of Dropbox from your computer —including all leftover files and folders — can be a tedious process for those without a technical background. For those people, it would be worth considering using Cleaner One Pro to make the process much quicker and easier.
How to Uninstall Dropbox on Mac
The process for removing Dropbox on a Mac is identical to that of any other application. Nevertheless, you must first disable the Dropbox sync service from running in the background.
Detailed instructions on how to delete Dropbox and all its associated files can be found below:
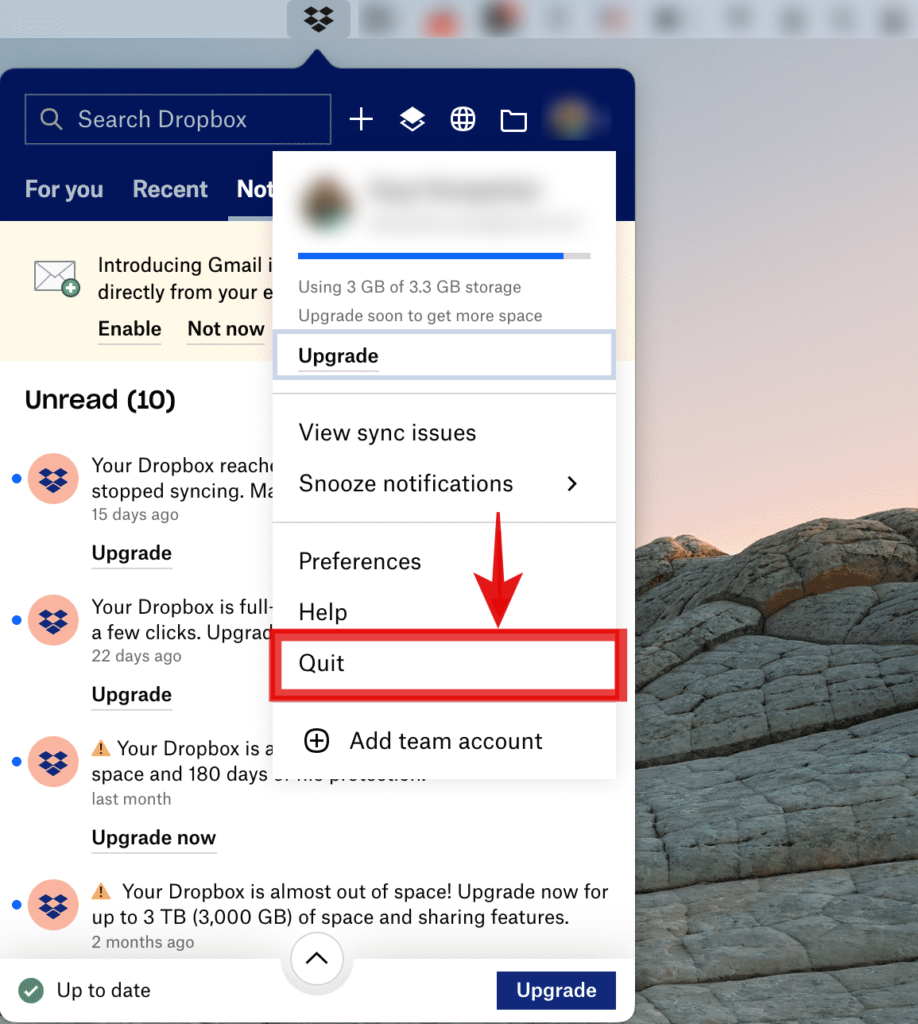
- Quit Dropbox. To do so, click on its icon in the menu bar, then on the user icon, and select the Quit option.
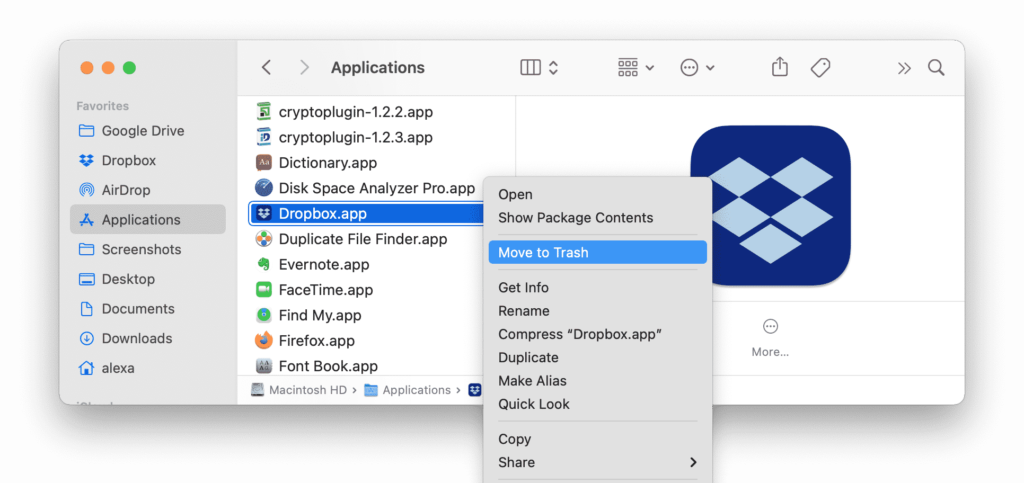
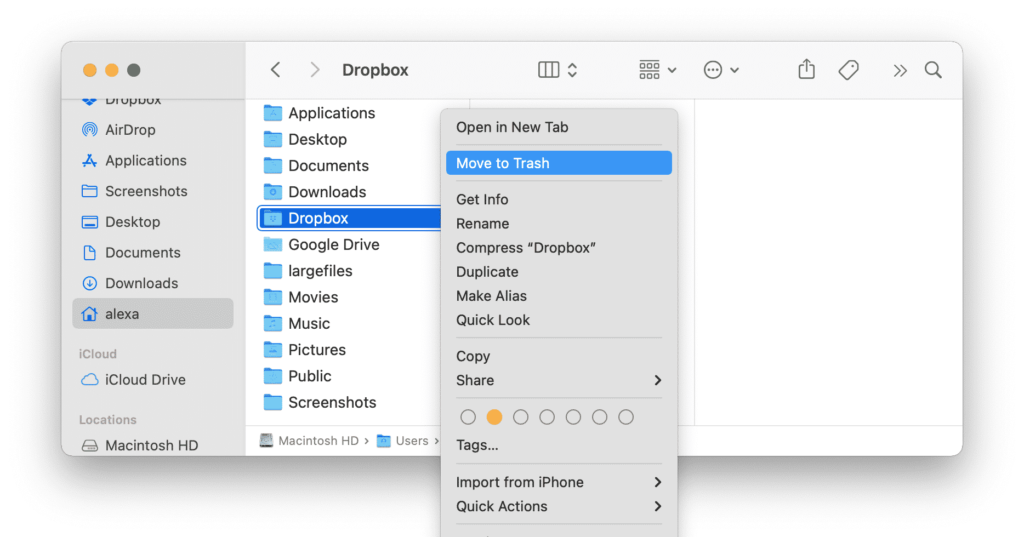
- Once the Dropbox status icon has vanished from the menu bar at the top of the screen, launch Finder and select Applications from the sidebar. Control-click Dropbox and choose the Move to Trash option.
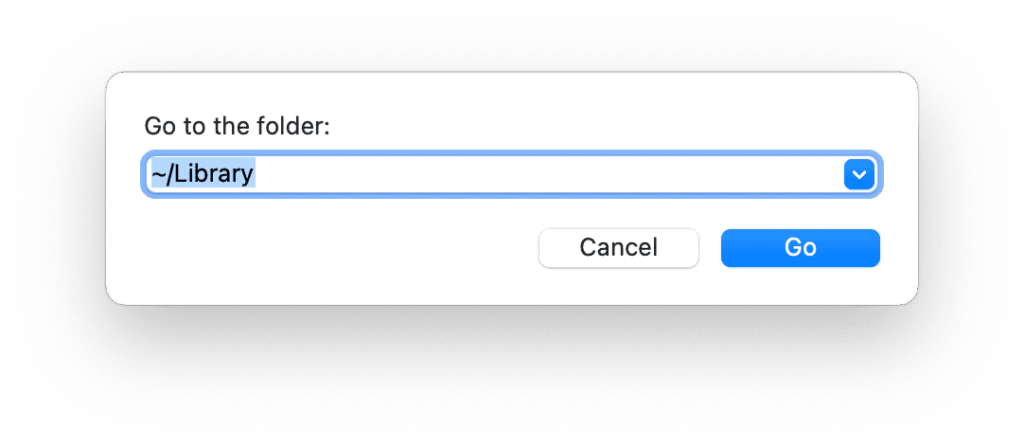
- Go to the Library folder and delete any leftover Dropbox files. To do so, in Finder, press the keyboard shortcut Command + Shift + G and browse to the /Library directory.
- Check the following list of directories for Dropbox-associated files. Remove all that you can find:
• ~/Library/Application Support
• ~/Library/Application Scripts
• ~/Library/Caches
• ~/Library/Saved Application State
• ~/Library/Containers
• ~/Library/Group Containers
• ~/Library/Preferences
• ~/Library/Cookies
• ~/Library/Launch Agents
• ~/Library/DropboxHelperTools
• ~/Library/Dropbox
Note: Removing these files isn’t mandatory, however doing so will free up space on your storage drive.
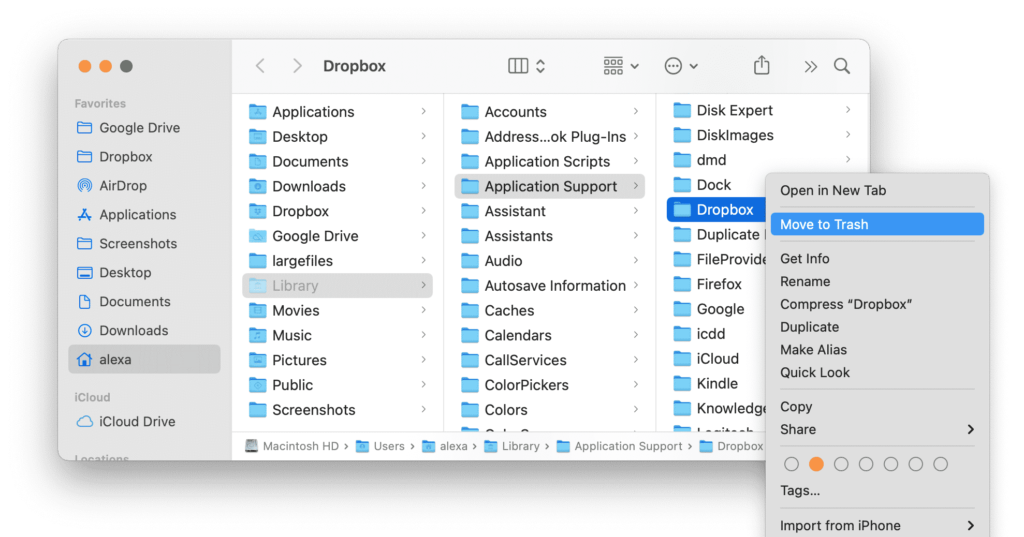
- Empty your Trash after eliminating all the leftover files. However, please note that the Dropbox folder (the one that used to contain your synced files) remains on your Mac. If you wish to remove it control-click it > Move to Trash.
How to Uninstall Dropbox on Windows
You can swiftly uninstall Dropbox using the Apps and Features utility of your PC. Here’s how to do so:
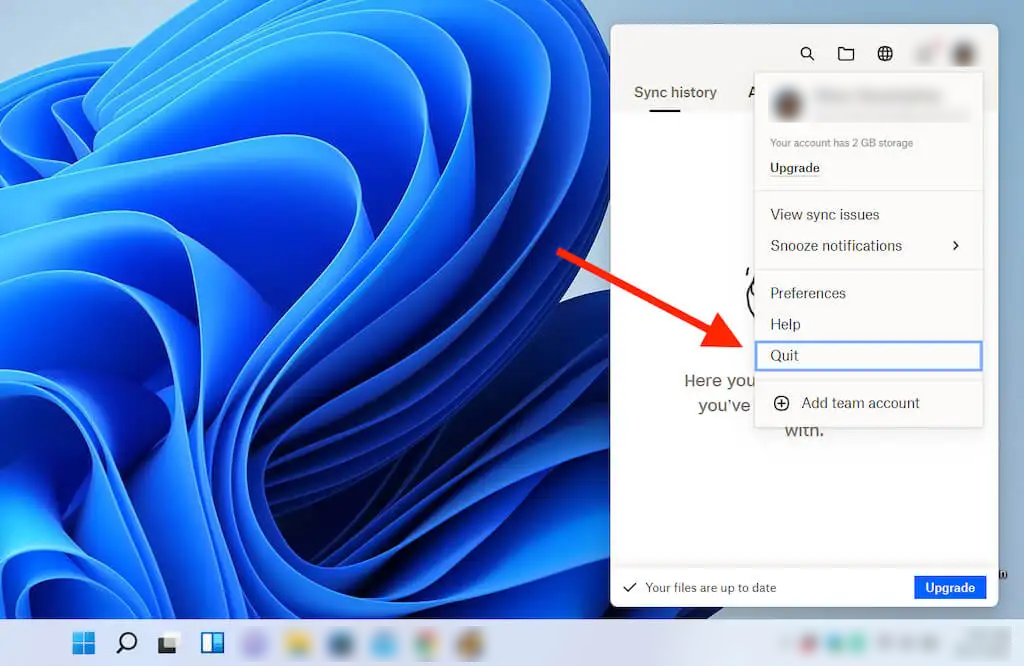
- In the system tray, right-click the Dropbox icon.
- Select your profile portrait and choose the Quit option.
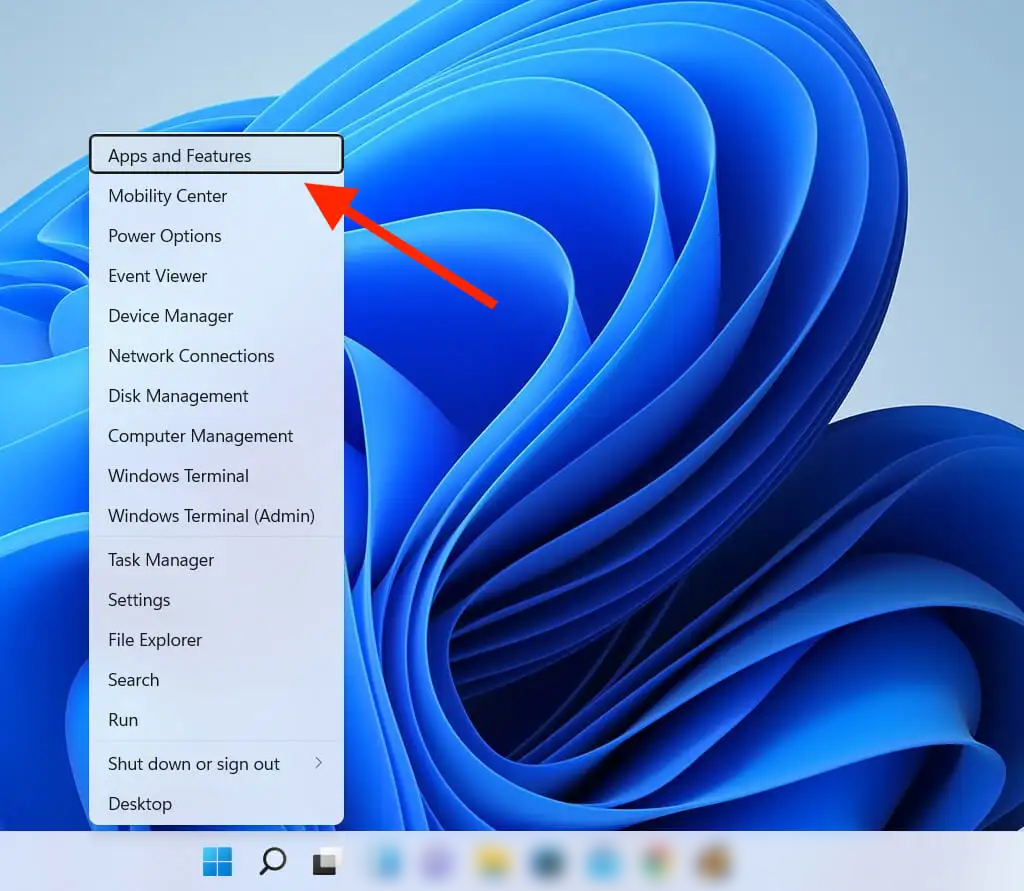
- Right-click the Start button and select Apps and Features.
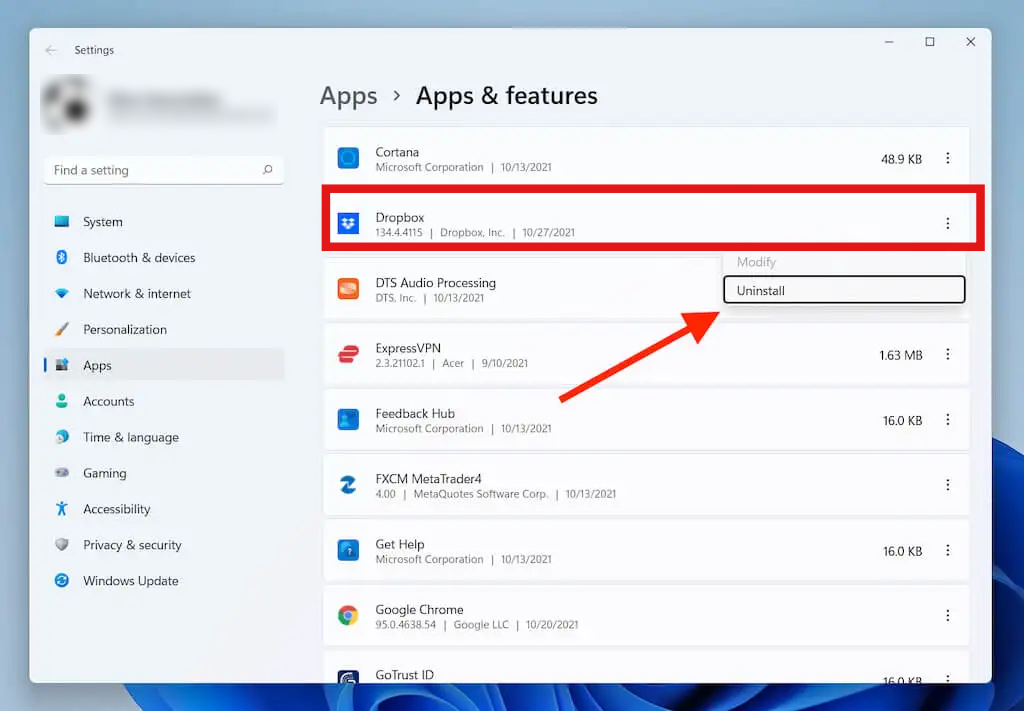
- Choose Dropbox and click the Uninstall button. Windows 11 users can click the More icon (three dots) next to Dropbox to uninstall. Follow the on-screen instructions to complete the uninstallation of the app.
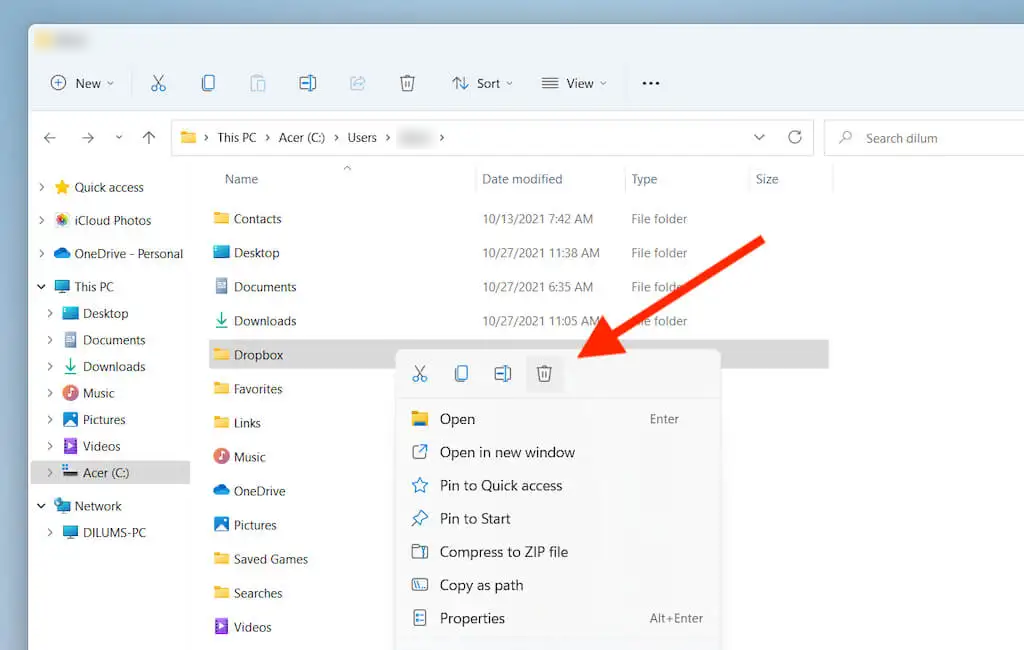
- Even after uninstalling Dropbox, the sync folder remains. Open your PC’s system disk (C) folder and click Users > [Your Username]. To erase the sync folder, right-click the Dropbox folder and choose Delete or Trash.
Other Options for Cloud Storage
If you do not want to reinstall Dropbox on your computer, you have various options for backing up and syncing files across devices. On Mac, iCloud Drive is integrated into the operating system. Similarly, you have OneDrive on Windows. Both services offer 5GB of storage to start, which is far more than Dropbox’s 2GB.
Let us know if you have any questions or concerns about removing Dropbox in the comments below.




You recommended downloading cleaner, one pro, I did, but nowhere did I see how to use it to accomplish finding all of the files associated with dropbox to delete. I was concerned about deleting Dropbox data, so I didn’t. I have not been able to get dropbox to work since I installed Ventura. The dropbox help pages. Are of no help
Hi, If you want to uninstall dropbox, Cleaner One Pro will only delete the application on your local drive but won’t influence your on the cloud.
Will this procedure for sure not delete the existing files in the dropbox ?
In general, uninstalling the Dropbox desktop app doesn’t remove the files in your Dropbox folder from your hard drive. Instead, it becomes like any other folder on your computer that doesn’t sync to your account online.