Browser Hijackers are usually promoted from bundle download packages of free software. Their nature is not malicious or damaging like viruses or malware, but they are quite frustrating to be dealt with. You may have downloaded it by mistake from not reading a checkbox during a software installation process, therefore, they are also seen as potentially unwanted programs (PUPs).
Symptoms of browser hijackers are forced modifications on web browser settings, most commonly home page, search engine or new tab URLs. You may constantly get redirected to various sites filled with ads, banners and pop-ups. Furthermore, some of them may contain spyware to collect browser activities or gather sensitive personal information.
Most reported browser hijackers lately are:
– Bing Redirect
– Yahoo Redirect
– Search Mine
– Search Baron
– Safe Finder
– Trovi
– Weknow.ac
– search marquis
– Alertsx
– Qsearch
– a23-trk.xyz
If you are experiencing any of the listed problems or having concerns of similar problems and would like to find a fix, you’ve come to the right place.
Remove Browser Hijacker with Antivirus One
It may take some time and complicated work to go through every file and folder mentioned in all the steps listed above.Antivirus One is a professional anti-virus tool that protects your device from all potential risks and attacks, so you can enjoy online browsing with ease. It provides automatic real-time scanning services and will eliminate browser hijackers before they even leave a trace.
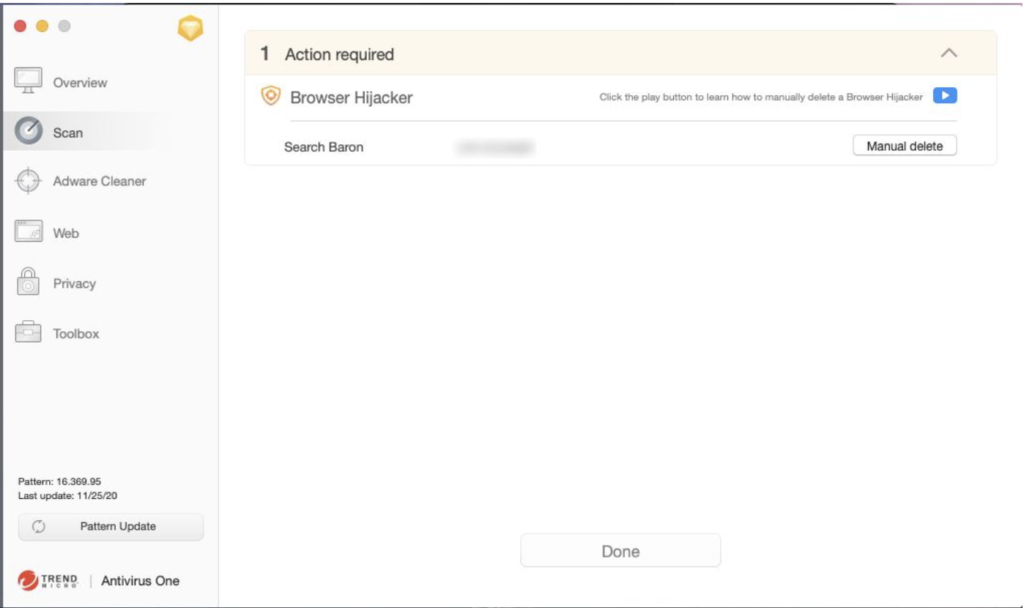
Learn more about How to Remove Browser Hijacker Detected by Antivirus One.
Get Antivirus One From App Store:

Manually Remove Malware and Browser Hijacker
Here we introduce 4 different ways for Mac OS users to manually identify and remove suspicious Browser Hijacking software, without the aid of any additional antivirus software.
STEP 1: Check Browser Settings and Extensions
The first time you realize the existence of a Browser Hijacker on your system is probably when the homepage or search engine is suddenly modified without your permission.
Try changing the homepage/search engine of your browser back to those that you used to use in browser Preferences. Then double check for any suspicious Extensions.
If changes are not saved after restarting the browser or the device, you may wish to check Steps 2, 3 and 4 to examine deeper in your system.
Check Safari Extensions:
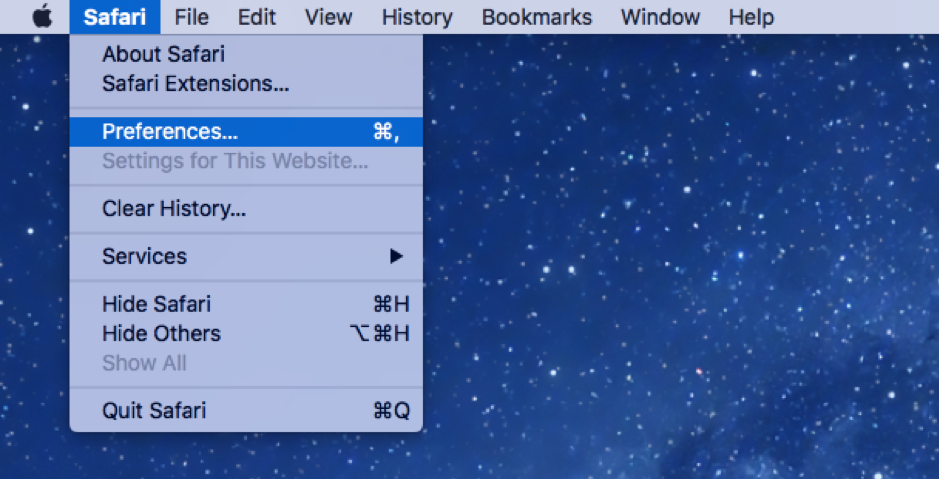
- Open Safari. In the tool bar at the top of your desktop, click “Safari”, then click on “Preferences” to open up the browser settings window.
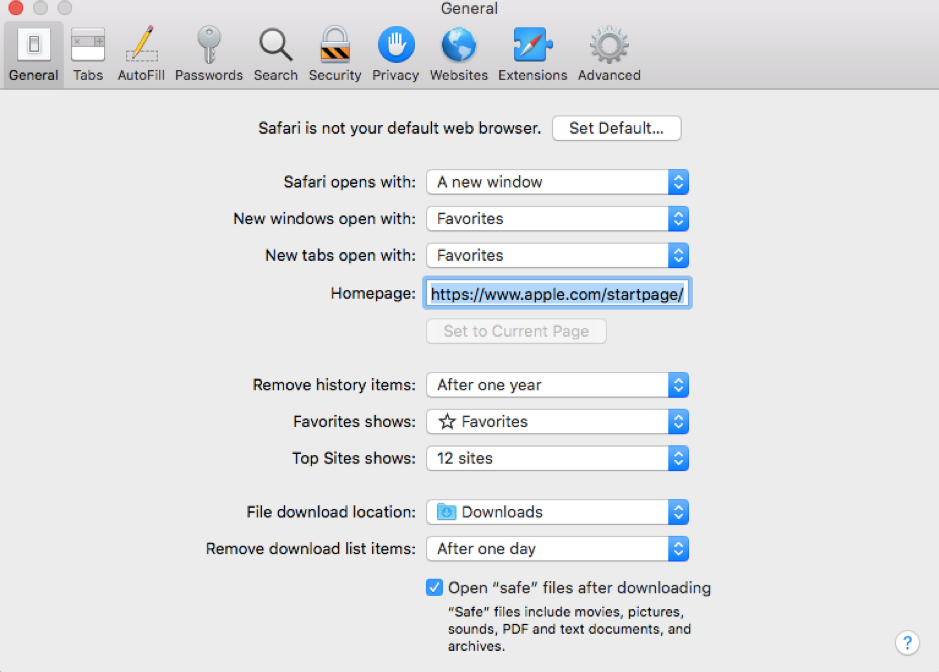
- Now on the tool bar of the browser settings window, click on General. You will see some preference settings like how to open up new a window/tab. At the “Homepage” line, you can view the current homepage address. If the address looks unfamiliar or suspicious, change it back to a trusted address. The default homepage for Safari is www.apple.com/startpage/ .
- To check if your search engine has been modified, click on the “Search” tab on the tool bar (5th from the left). Then click on “Search Engine”, you will see a list of search engines that you can change to.

- Lastly, check Safari Extensions by clicking on the “Extensions” tab on the tool bar (second from the right).
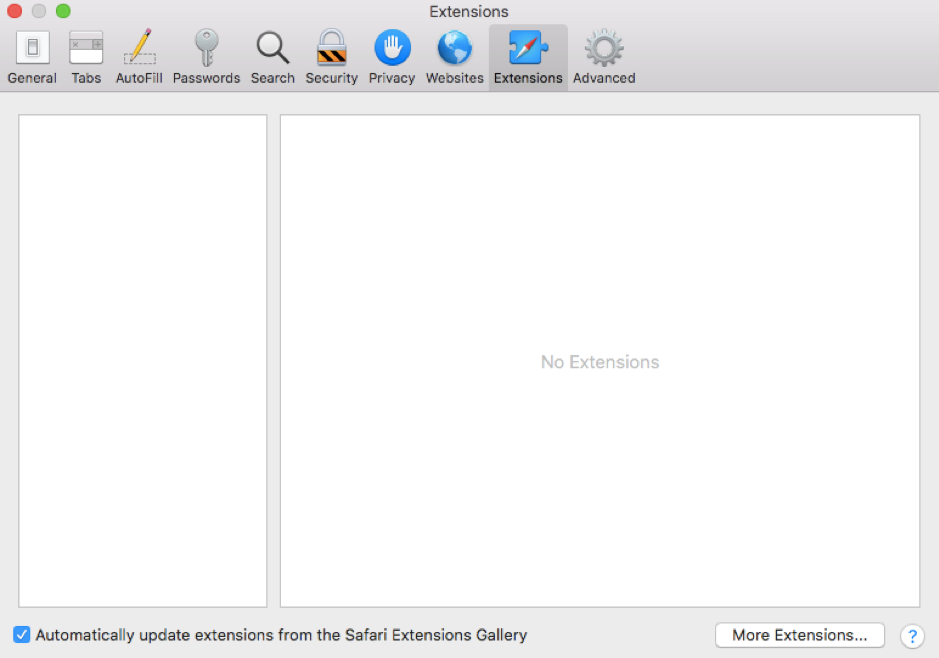
You will see a list of names in the box on the left, click on the extension name to view details, permissions, or uninstall it in the large view box. Extensions by unauthorized developers may include adware or spyware, which injects unwanted advertisement or steals information from your saved keychain/card details. Again, if any unknown or suspicious extensions are spotted, it is better to remove them.
Check Chrome Extensions:
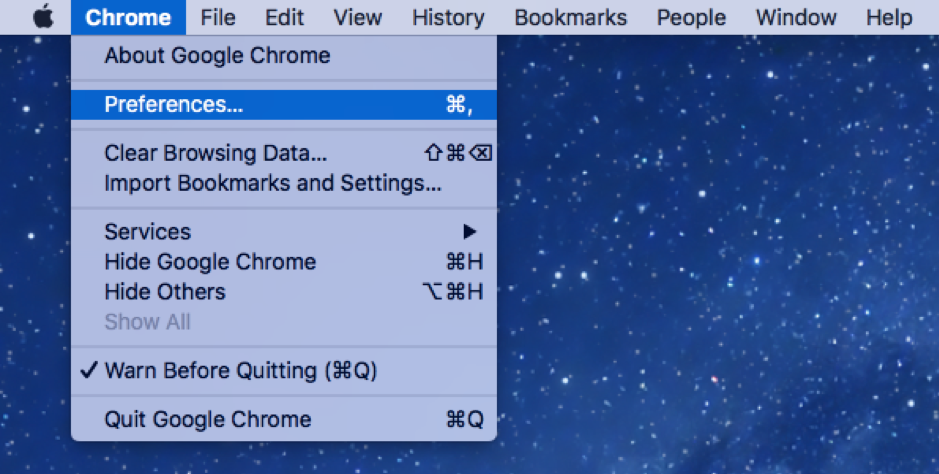
- Open Chrome. In the tool bar at the top of your desktop, click “Chrome”, then click on “Preferences” to open up a settings window.
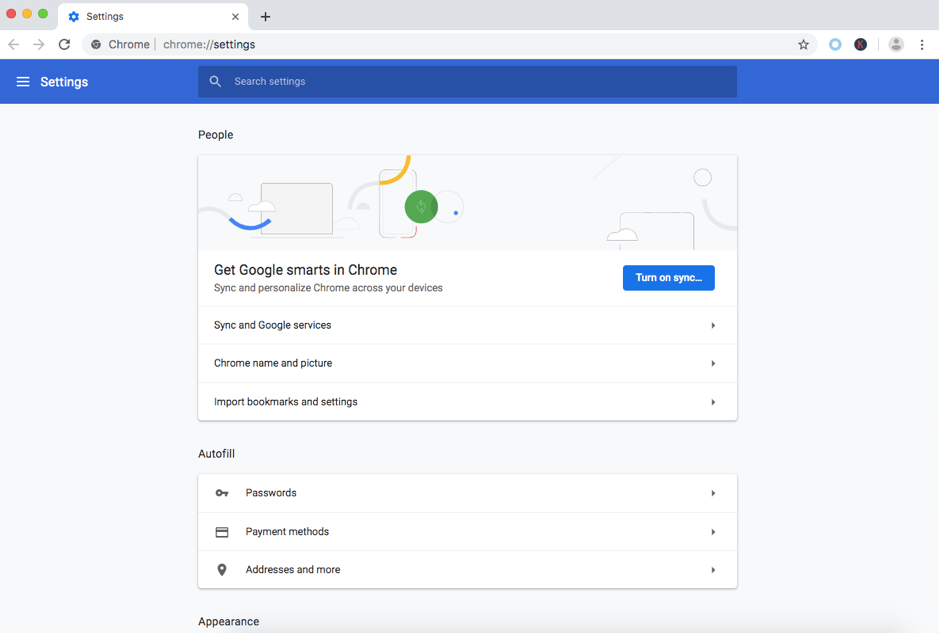
- Scroll down the settings page, at the “Search engine” section, you can find “Manage search engines”.
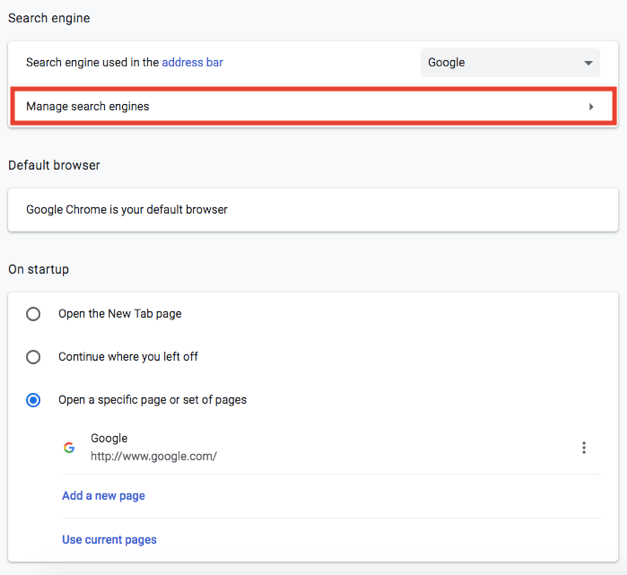
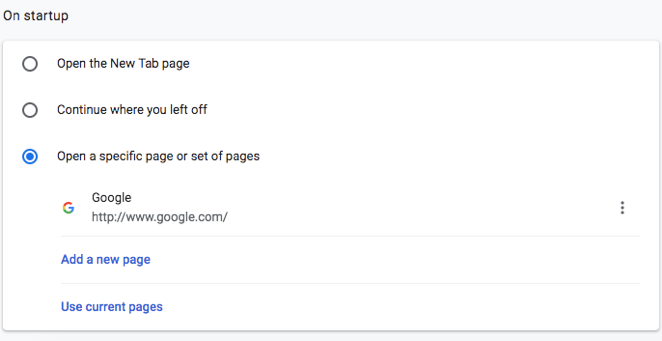
You will see a list of current search engines on your Chrome. Click on the 3 dots at the very right of the list to delete any search engines you do not wish to have. - Go back to the main settings page. If you need to change the startup homepage address, scroll to the bottom and find section “On startup”. Under the third option named “Open a specific page or set of pages”, enter the homepage address as you prefer.
- To check and manage current Chrome extensions, click on the 3 dots to the right of the address/search box as shown.

In the drop-down list, click on “More Tools” (4th last of the list).
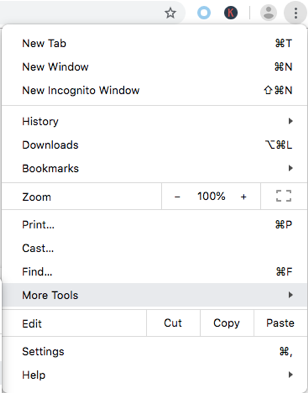
In the next list expanded, find “Extensions” in the second section.

This opens up a window that shows all your current extensions. You can view details such as developer, version, size, access permissions of an extension, or remove it from Chrome browser. The switch button at the bottom right of each extension name card indicates if the extension is currently turned on for use.
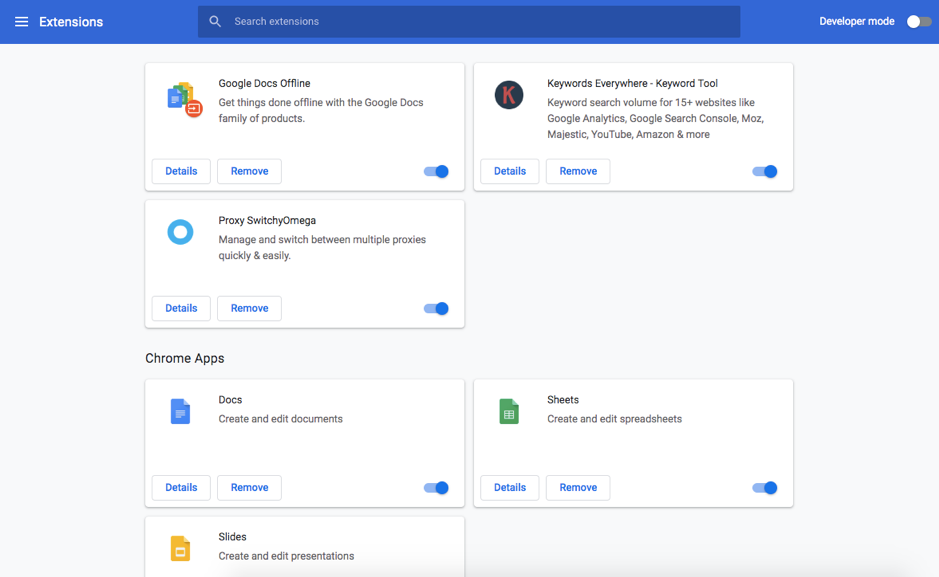
For suspicious extensions, it is worth checking their sources and the developer profiles by clicking on “View in Chrome Web Store”, which is at the bottom in the “Details” page of every extension.
STEP 2: Check System Login Items
As noted in step 1, if your browser settings get modified every time you restart the browser or the device, the malware may not be simply in the browser, but somewhere deeper in your system.
This simple step allows you to check what programs are automatically opened at system login.
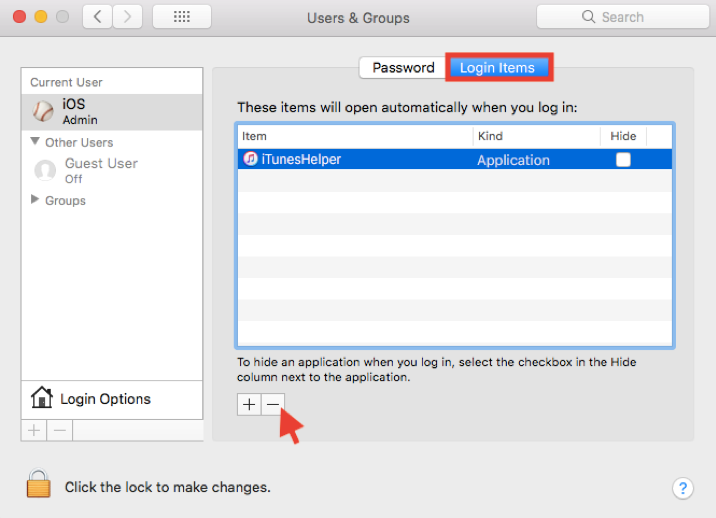
- Open “System Preferences”.
- Click on “Users & Groups”.
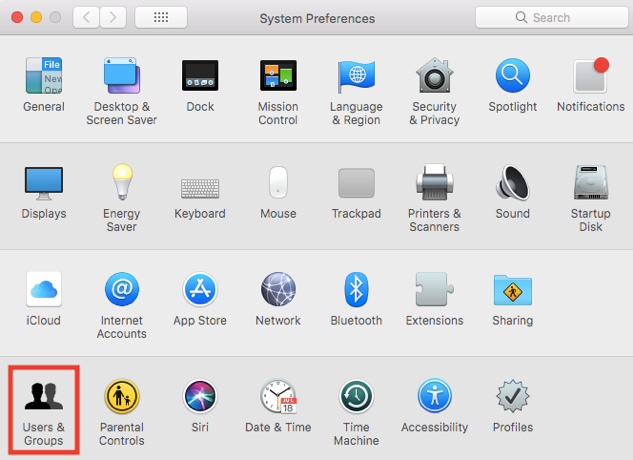
- The “Password” page allows you to change user login password and manage user list. Click on “Login Items” to view a list of programs that automatically open when you log in. Click on the “-” sign to remove any items you do not want to start at login. As mentioned in Step 1, if your browser setting changes do not save after restarting the device, there is a good chance that a malware was installed to be opened at login, to modify your settings every time the device is restarted.
STEP 3: Check for All Recently Modified Applications
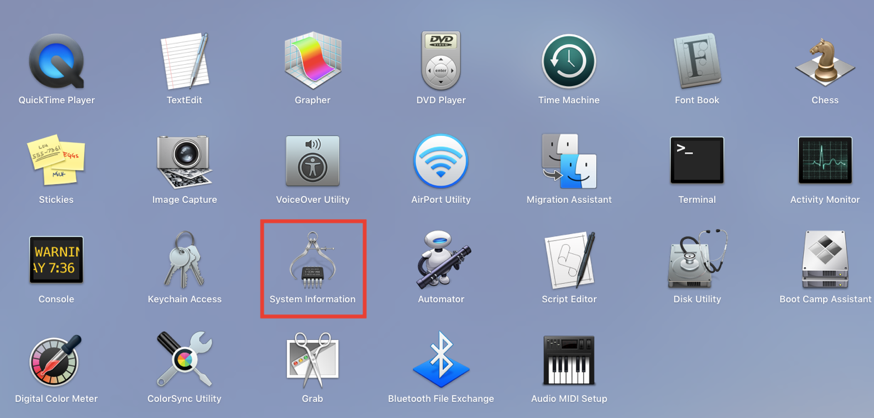
In “System Information”, you can view all applications including hidden ones that run in the background. There are 2 ways to open the “System Information” application.
1. “System Information” is usually inside “Other” folder on your LaunchPad, as shown.
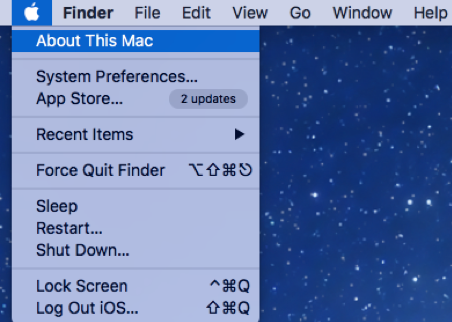
Otherwise, you can open “System Information” by clicking on the Apple icon on your desktop tool bar. In the drop-down menu, click “About This Mac”.
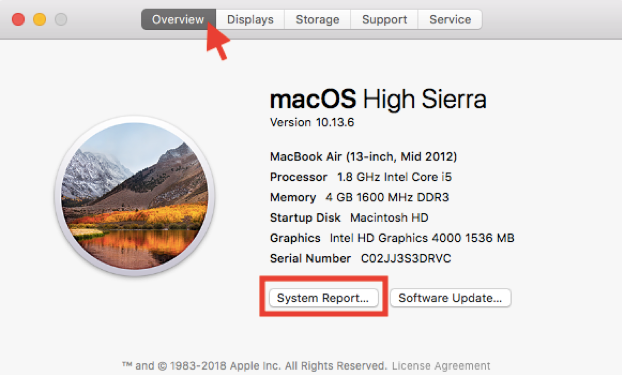
2. Now that “System Information” is open, click “Overview” on the toolbar (this is usually opened by default), then click to view “System Report”.
3. In the new window, scroll down to expand the “Software” section, then click on “Applications”. A list of applications will be displayed in this window. For the purpose of finding malware that has been modifying your system undercover, click on the column title “Last Modified”, to sort applications by the latest date of modification. If you find any recently active malware, you can copy its location address and go to the folder to completely remove it.
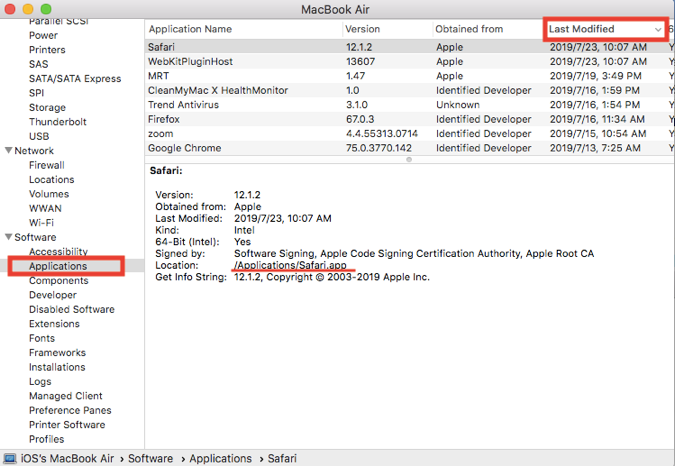
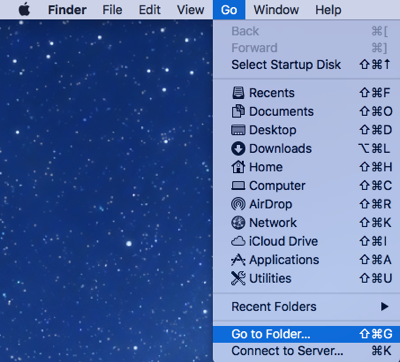
4. To go to a specific folder address, first open “Finder”. In the tool bar at the top of your desktop, click “Go”, then click on “Go to Folder” (second last) to open up a window to enter a destination path.
STEP 4: Check for Suspicious Auto-Launch Files
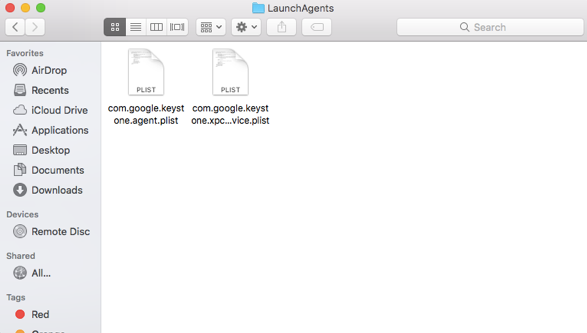
This step takes you to the system folder where files that automatically launch at (software/device startup?) are stored. If all the above steps couldn’t expose the malware, try examining this folder manually. Auto-launch files from authorized developers usually have a formatted name that is easy to understand, like “com.PROVIDER.XXX.plist ”.
- Open Finder. In the tool bar at the top of your desktop, click “Go”, then click on “Go to Folder” (second last) to open up a window to enter a destination path.
- Enter any of the following paths:
a. /Library/LaunchAgents/
b. /Library/LaunchDaemons/
c. ~/Library/LaunchAgents/

- This takes you to the LaunchAgents folder, which are locations that contain scripts to automatically manage system processes. For instance, Apple uses one of these scripts to schedule the “backupd” process for Time Machine, and have it create backups every hour.




Great article. I am dealing with some of these issues as
well..