Has your Mac been feeling overly cluttered lately? Perhaps it’s been running a bit more slowly than normal, too. Maybe recently you checked out your Mac’s storage settings and saw that something called “System Data” is taking up lots of space. Many people have no idea what “System Data” is, but if you want to learn about it, clear it, and get your Mac running better, you’re in the right place, so keep on reading!
What is System Data?
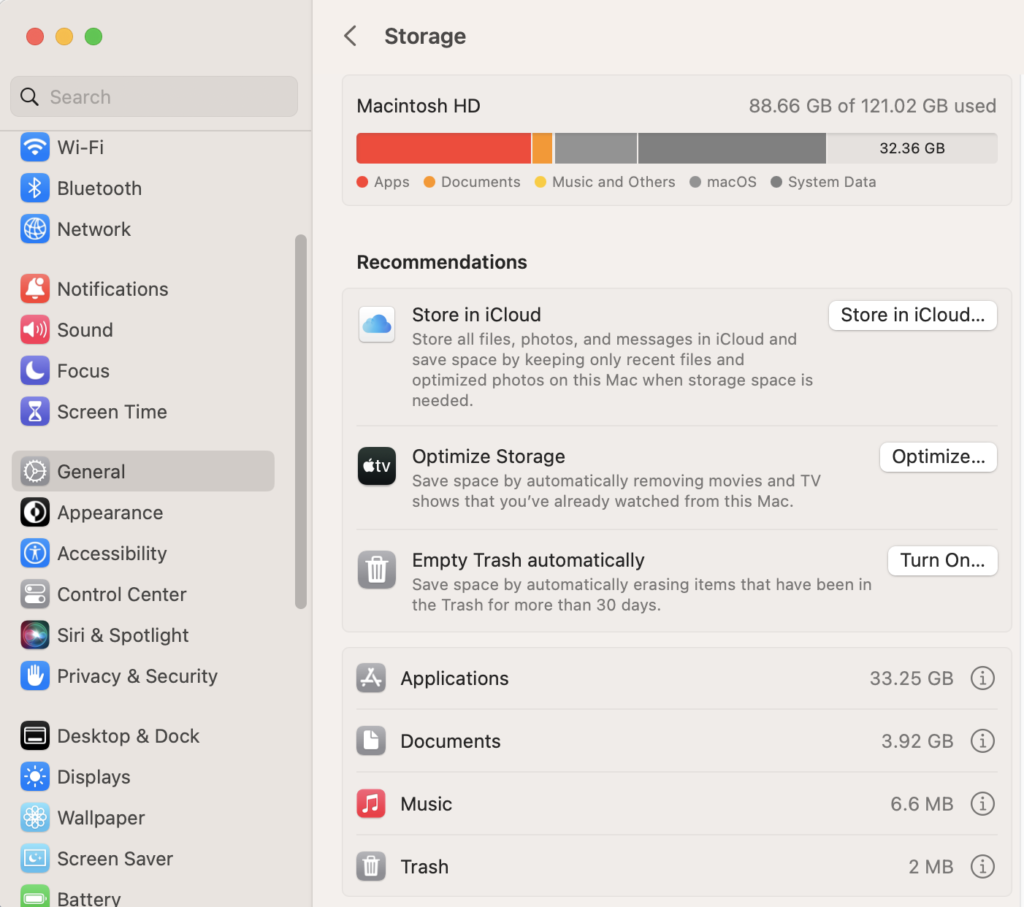
To check your system storage, click on the Apple menu > About This Mac > More Info > General > Storage Settings. You will see lots of information about what is taking up space on your Mac. Among the different categories, you’ll see “System Data”. It refers to things like application leftovers (left behind after uninstallation), disk images, system log files, browser and application cache, plug-ins, extensions, and so on. In other words, it is a collection of miscellaneous files that do not belong to the other categories within the colored bar (Apps, Documents, Music and Others, macOS).
How to Reduce System Data on Mac
Some of the temporary files generated by macOS and your apps usually get deleted automatically. But some of them don’t and thus accumulate, leading to Mac System Data gradually growing bigger. You’re probably wondering how to delete these types of files and free up space on your Mac. Below are some tips to help you do exactly that.
1. Optimize Your Storage
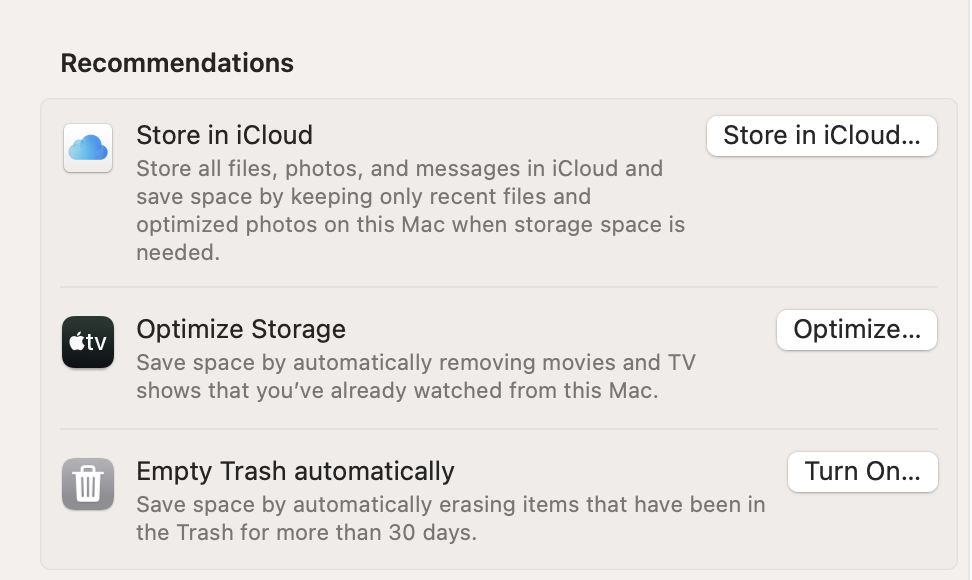
This is an easy solution offered by Apple to reduce your storage. You’ll find it under the Apple menu > More Info > General > Storage Settings. After navigating there, you’ll see some useful recommendations:
- Store in iCloud: You can transfer all your files, photos, and messages to iCloud to save space, keeping only recent files on your Mac’s local storage.
- Optimize Storage: Save space by automatically deleting things taking up space, like apps you haven’t used in a long time, and movies and TV shows you’ve already watched.
- Empty Trash automatically: Turning this option on can help your Mac free up space by automatically removing things that have been stored in the Trash for more than 30 days. This feature can be very useful especially when you forget to regularly clean the Trash by yourself.
Additionally, click the “i” next to the Documents category, and you can review the files stored on your Mac. From here, by clicking the Unsupported Apps tab, you can view files belonging to apps you may have downloaded that are not compatible with your Mac — and thus a waste of space and prime targets for deletion.
2. Remove Time Machine Snapshots
One of Time Machine’s features is that it records changes to your system and stores them to your Mac’s internal storage. These are called “Local Snapshots”, which can protect your data when an external drive is not connected. However, when your Mac runs low on storage, one straightforward method to free up space is to get rid of these local snapshots.
It’s very easy to delete local snapshots by simply turning off the Time Machine feature, but this will delete all of the local snapshots stored on your Mac. So, remember to think twice before doing so and make sure what you remove is not needed, because it might be difficult to get it back.
To remove local Time Machine backups, here’s what you need to do:
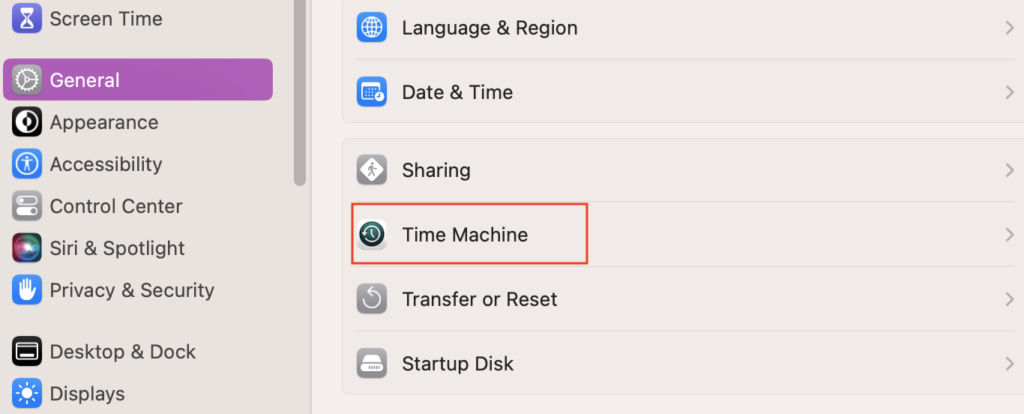
Click the Apple menu > System Settings > General > Time Machine, and then untick the Back Up Automatically box.
3. Remove Old iOS Backups
Old backups from your iPhone or iPad could also be another reason your Mac is running low on storage space. If you believe you no longer need them, the steps to clear them are as follows:
Go to Finder, and click your iPhone or your iPad. Select Manage Backups…, and highlight the ones you no longer need. Click Delete Backup, then confirm your choice.
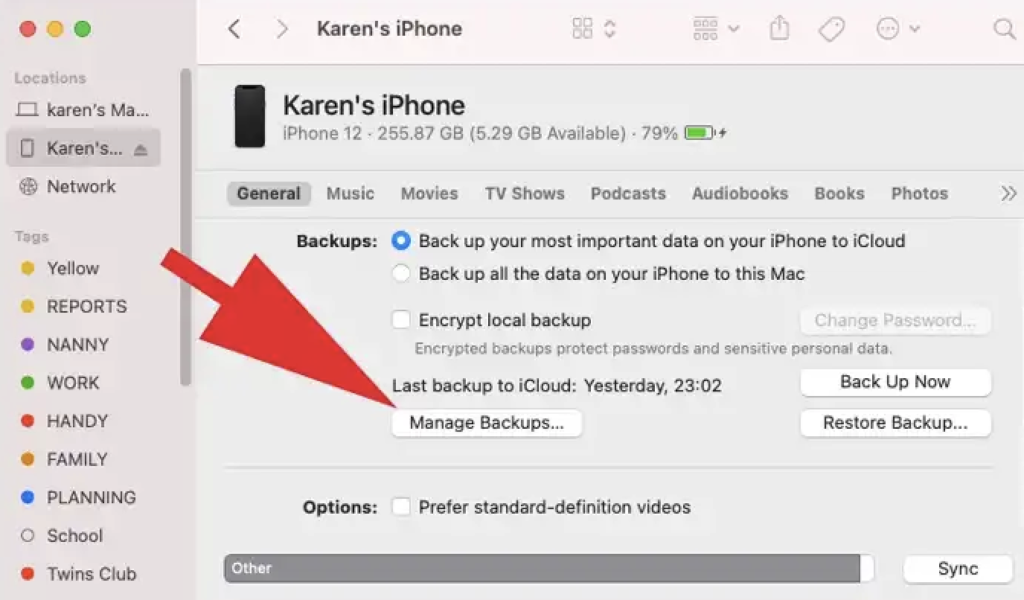
Note: If you can’t find your iPhone or iPad, it means you don’t have any backups stored on your Mac.
4. Clean Up the Downloads Folder
For most Mac users, it’s easy to forget to clear the Downloads folder, which could be occupied with all kinds of items, including photos, movies, PDFs, app installers, files you downloaded a long time ago, etc. These things are likely a huge waste of storage space. Here’s how to deal with them:
Open Finder and click Downloads. Click the arrows next to the Size panel to sort files by size. Then you’ll be able to see the largest files (the ones taking up the most storage space) at the top of your list. Move any files you no longer need to the Trash.
5. Empty the Trash
When you delete files from your device, they go to the Trash. Over time, these files can pile up, and thus take up a lot of space on your computer. Therefore, emptying your Mac’s Trash is a good way to clear some storage space. There are two simple methods you can follow to accomplish this:
- First, right-click on the Trash icon in the Dock. Then, select Empty Trash. You will see a pop-up on your device asking you to confirm your choice; click Empty Trash if you would like to permanently erase the items.

- Second, click Finder (next to the Apple menu), then select Empty Trash.
6. Clear System Data with Cleaner One Pro
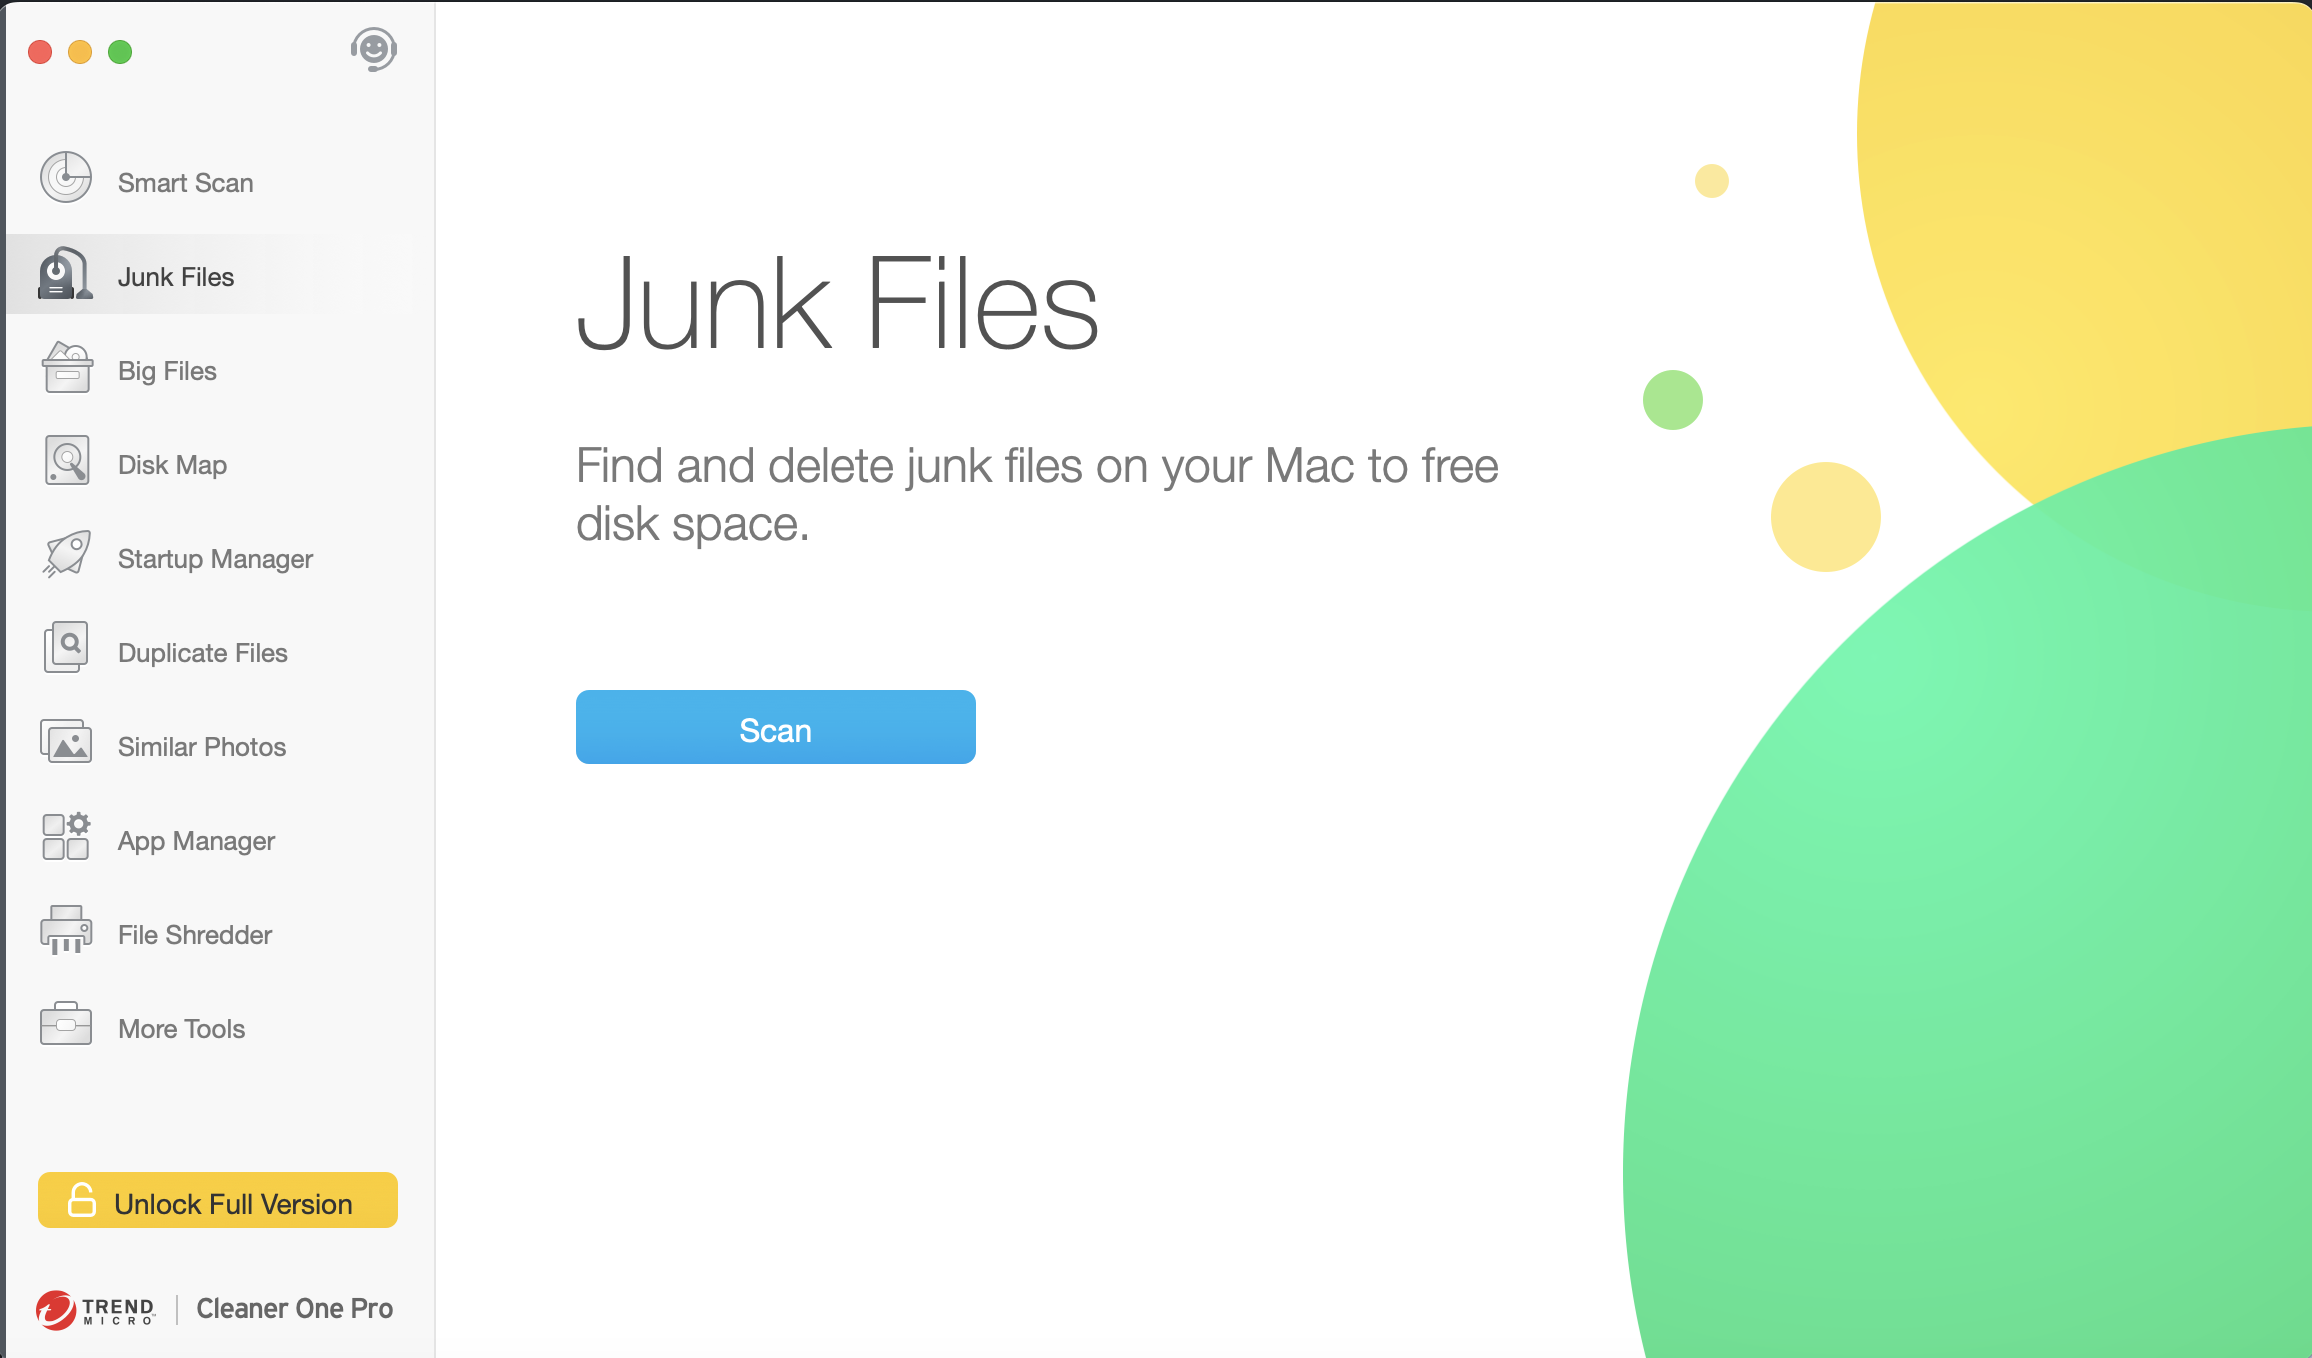
If you’d like to remove system data automatically to save your time and effort, you can consider using a reliable all-in-one cleaning utility like Cleaner One Pro. All you need to do is a few clicks, and then Cleaner One Pro will scan your Mac for unnecessary files, caches, logs, and duplicates, and efficiently removes them. Meanwhile, it helps you easily uninstall applications and associate files, thus decluttering your system and optimizing performance. Here are steps to get started:
- Download and install Cleaner One Pro.
- Launch the Cleaner One Pro application.
- Click on the Smart Scan button to scan your system for unnecessary items and delete them.
Hopefully, by following the tips above, you will be able to free up enough storage space on your Mac to improve its performance and be able to enjoy a clutter-free computing experience!


