Whether you’re selling, trading it in, or passing it on to others, factory resetting your MacBook is a smart choice. By doing so, you not only ensure the safety of your data but also avoid potential issues that may arise from remaining connected to various services and software you’ve used. Additionally, a reset allows the new user to experience the MacBook as if it were brand new, while also providing a helpful solution to fix problems and improve performance. Follow our comprehensive step-by-step guide to learn how to factory reset your MacBook Pro or MacBook Air, erase the hard disk, and wipe out data, covering methods for both new and old Macs.
Create a Backup
Before you start, remember to securely store the data from your old Mac. If you plan to reuse your files and docs with your new device, the built-in tool Time Machine is a great choice. It can automatically backup your entire system, including music, photos, apps, email, system files and other documents. Below are the instructions that will help you to do so.
- Connect an external hard drive to the Mac.
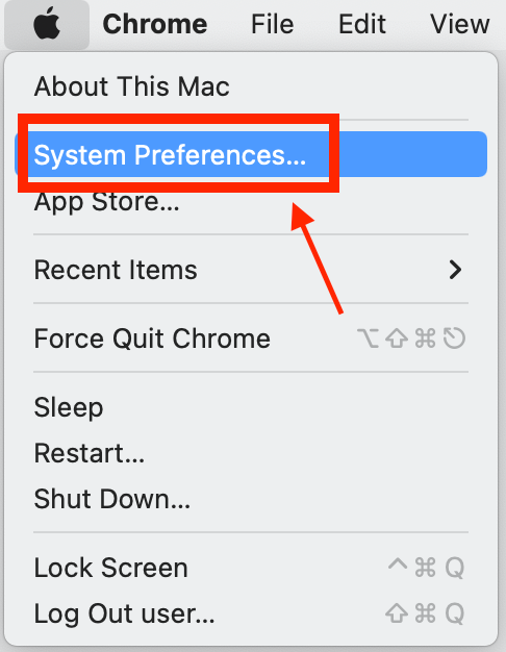
- In the upper-left corner of the screen, click the Apple icon > System Preferences.
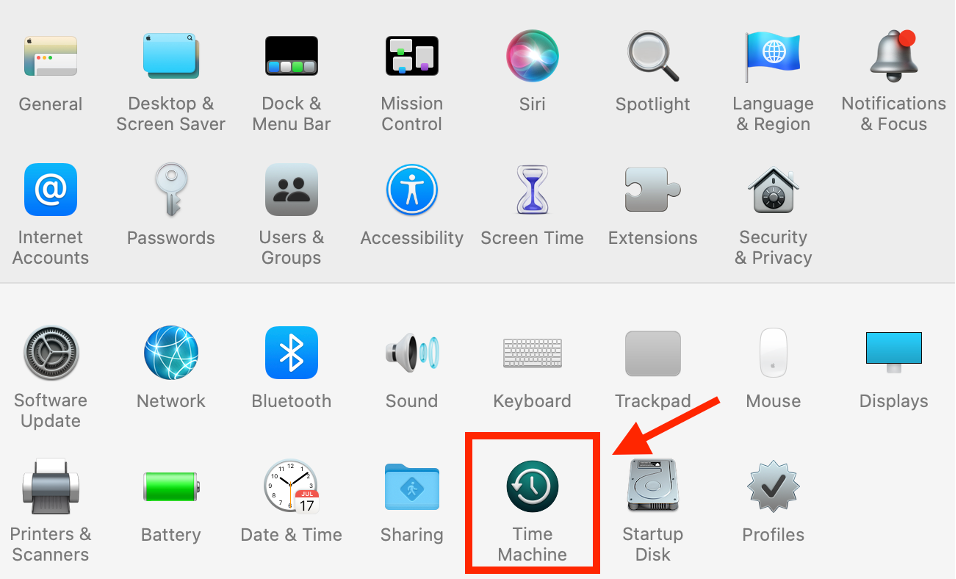
- In the pop-up window, click Time Machine.
- Click Select Backup Disk.
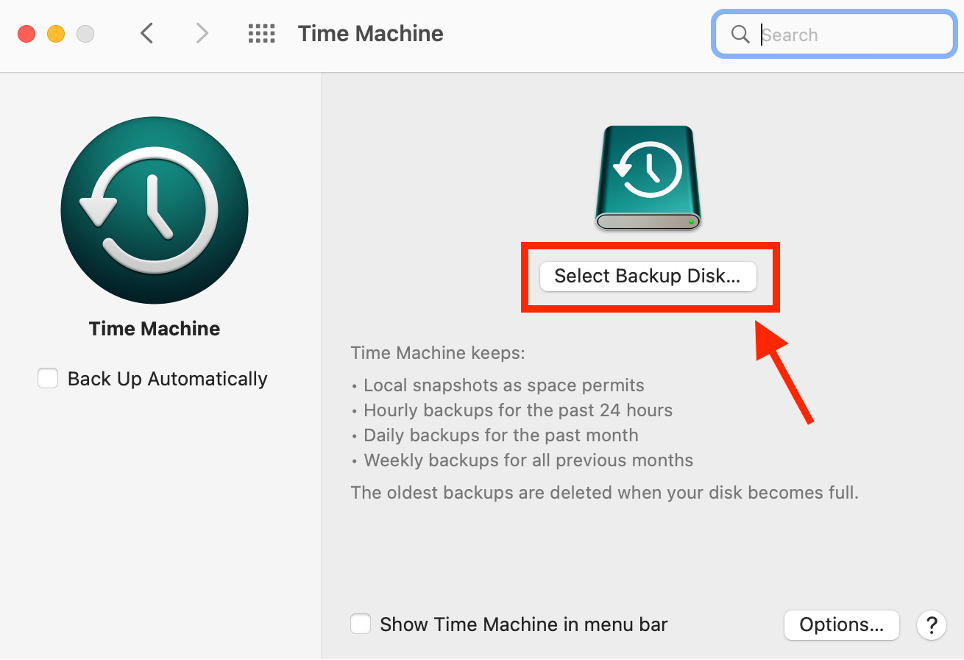
- Select your external drive and then click Encrypt backups and Use Disk.
Time Machine will immediately begin to backup automatically. After resetting your MacBook to its factory settings (see next part), you can restore this backup by reconnecting your external hard disk to your new Mac.
Perform a Factory Reset
The steps to reset your MacBook to its factory settings depend on your operating system. For Macs running macOS Monterey (12.0) or later, you can click System Preferences > Erase All Content and Settings to start the procedure easily. This option removes all of your information and downloaded apps without deleting macOS.
For earlier versions of macOS, follow these instructions:
- Ensure your Mac is connected to the internet.
- Shut down your Mac.
- When restarting your Mac, press and hold Command+R to boot it up in Recovery Mode. Hold both keys until you see the Apple logo.
- In the Utilities window that appears, click Disk Utility.
- Then click View and click Show All Devices.
- Choose your hard drive and click Erase. (It will likely be titled “Macintosh HD.”)
You’ll have to wait for the clean-up of your Mac’s hard drive to complete. Afterwards, you can reinstall macOS:
- Quit Disk Utility and return to the Utility menu.
- Click Reinstall macOS > Continue.
- Follow the on-screen instructions to install OS.
- The Mac will restart when the installation is completed. Simply enter your Apple ID and username.
If you reset your Mac in order to sell it, press Command+Q to shut down the machine. If you want to reboot your Mac to boost its performance, there’s an easier option.
Don’t Reboot It
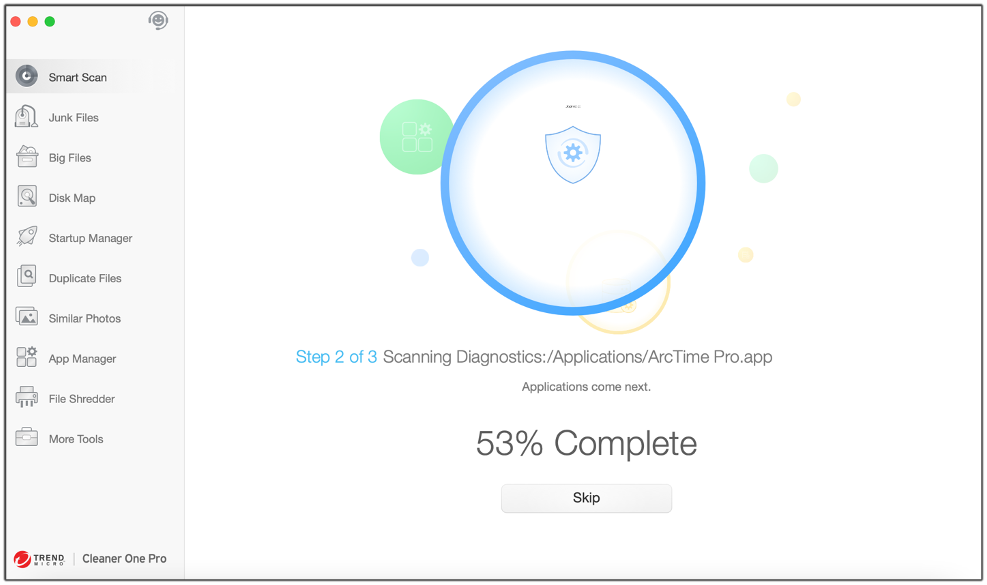
Instead, consider a scan and clean of your Mac with Cleaner One Pro, an all-in-one Mac cleaner that declutters and protects your mac. It is simple and easy to use — all you have to do is to click Smart Clean. The free download can be found here.
As ever, if you’ve found this article to be a helpful and/or interesting read, please do SHARE with friends and family to help keep the online community secure and protected.


