Let’s talk about macOS Monterey’s features, compatibility, download method and upgrade problems.
Apple released the first public beta version of macOS 12, named Monterey, on July 1. The new OS has many exciting features including a new tab bar and tab groups in Safari, Focus Mode, Quick Note and better synergy between mac and iPad. Just like you, we can’t wait to download and test the macOS Monterey. Now, we come back to tell you three things about the new system—should you upgrade to macOS Monterey; how to upgrade; upgrade troubleshooting and the downgrade method.
Should you upgrade to macOS Monterey
MacOS Monterey will create better user experience by seamless synergy, SharePlay and so much more. However, the public macOS Monterey beta still has many bugs and instabilities. We highly recommend you to install it on a spare Mac or wait for the full version.
Before downloading the beta version, please go to About This Mac—Overview to check whether your Mac meets the compatibility requirement.
Hardware requirements:
• iMac — late 2015 and later
• iMac Pro – 2017 and later
• MacBook Air – early 2015 and later
• MacBook Pro – early 2015 and later
• Mac Pro – late 2013 and later
• Mac mini – late 2014 and later
• MacBook – early 2016 and later
New features are as follows:
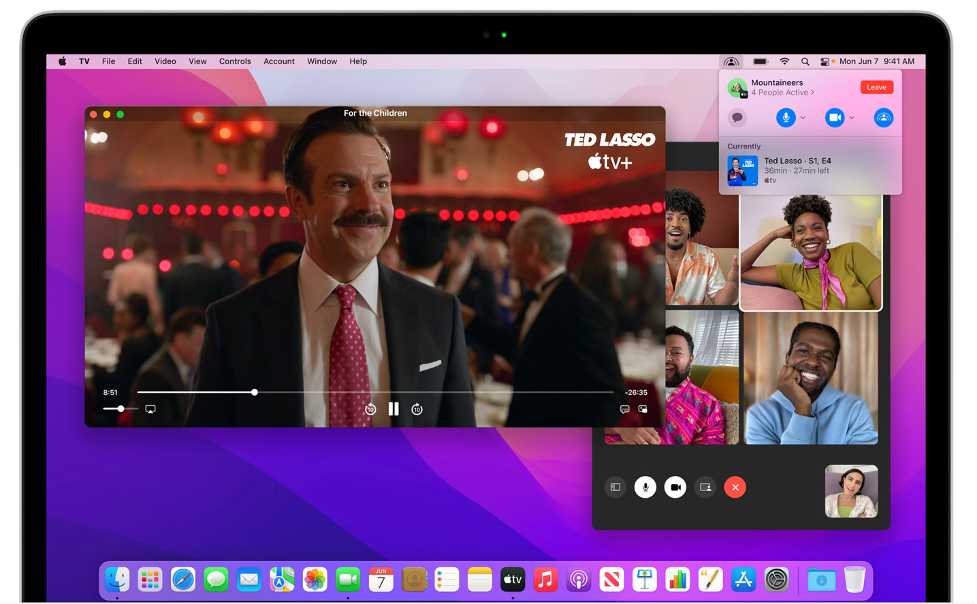
• SharePlay. With SharePlay, you can watch together, listen together, and share your screen right inside FaceTime.
• Streamlined tab bar and tab groups. Redesigned tabs float on top of the page and can change color along with the site. You can create your own tab groups and access them on iPhone and iPad.

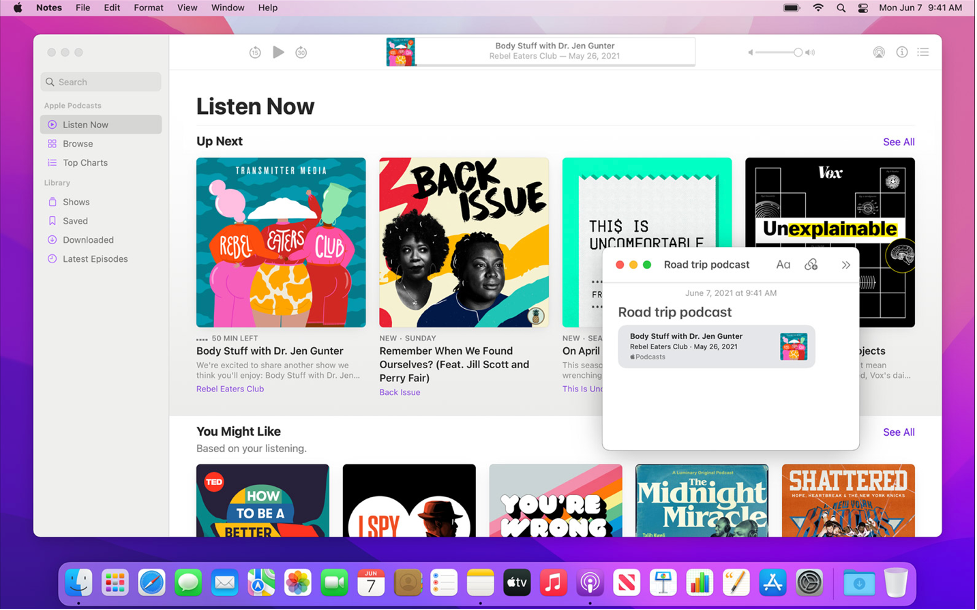
• Quick Note. You can call up Quick Note by the keyboard shortcut, Hot Corner or Action Center.
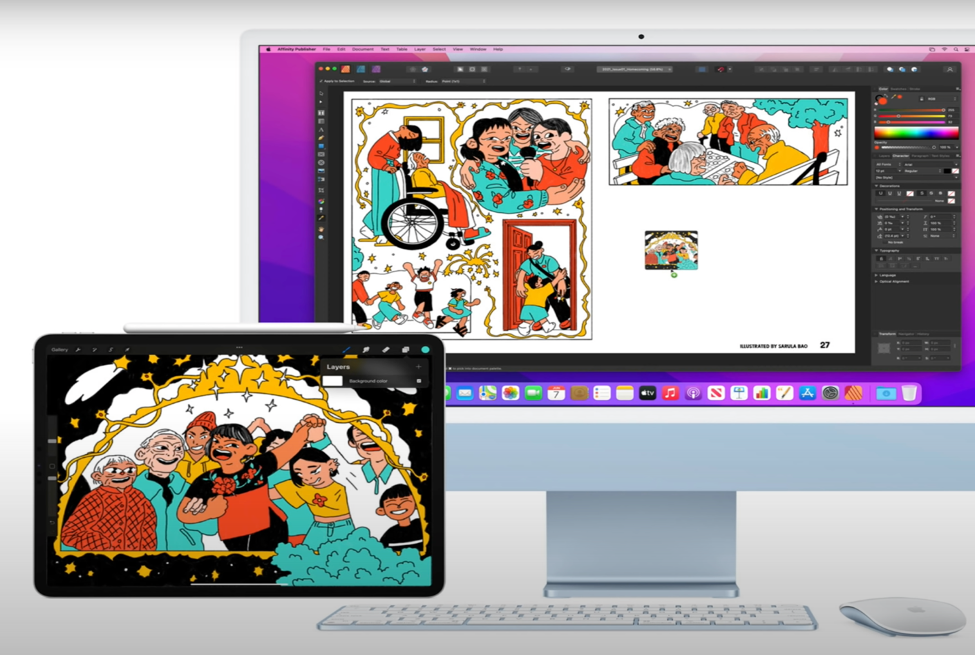
• Universal Control. Better synergy between iPad and Mac just needs a single keyboard and mouse/trackpad.
• Airplay to Mac. Now you no longer need a data line or third-party software for Airplay to Mac.

How to upgrade to macOS Monterey
Here are instructions to download macOS Monterey beta.
- Go to Apple Beta Software Program website (https://beta.apple.com/).
- Log in with your Apple ID.
- Go to Get Started > Enroll your Mac.
- Please back up your Mac with Time Machine first and then download the macOS Public Beta Access Utility.
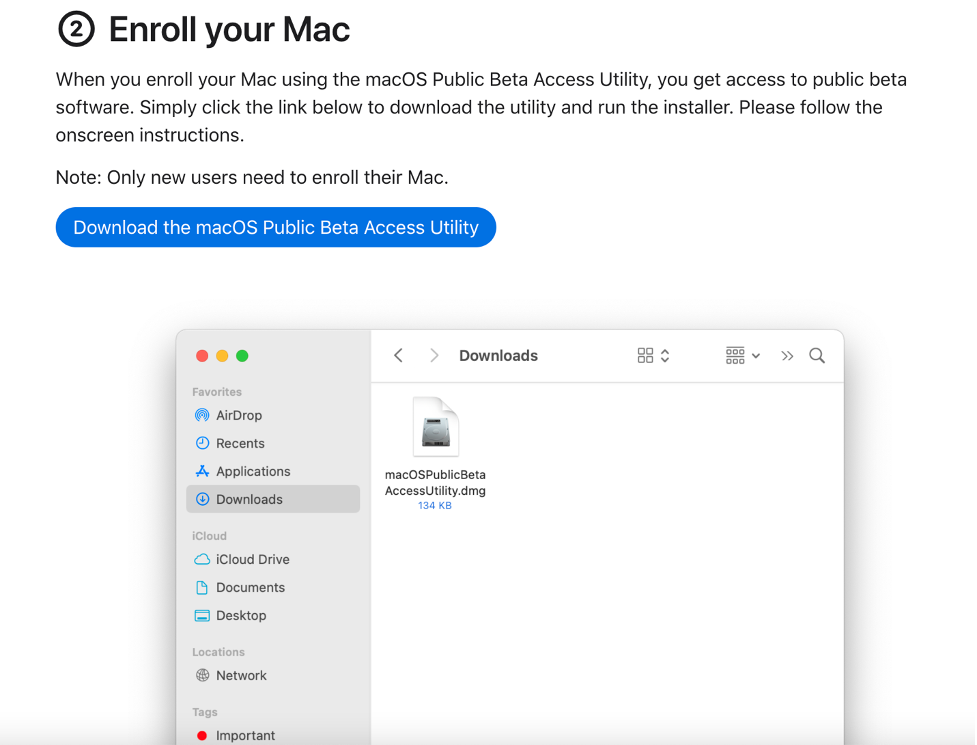
- After you have completed the enrollment, you can download and install the macOS public beta from Software Update in System Preferences.
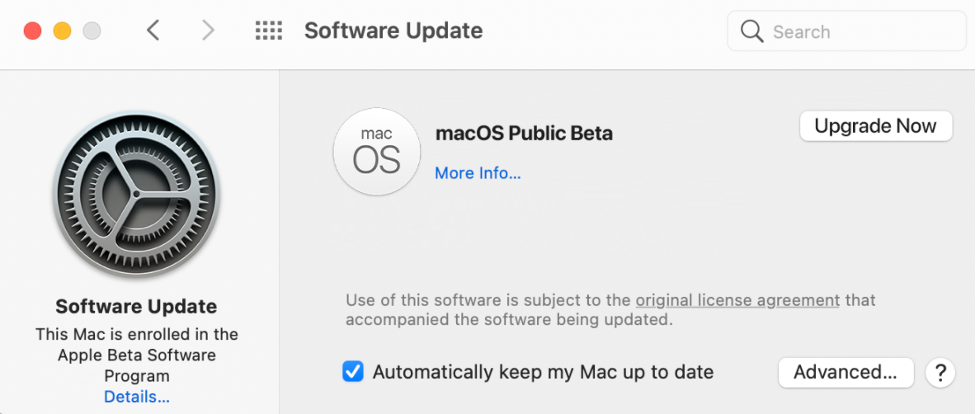
- After the macOS public beta finishs downloading, the installer will launch and guide you through the whole installation process.
Upgrade troubleshooting and the downgrade method
You may encounter problems during the upgrade process. Here we offer solutions to several common ones and hope that you could find what you need.
Problem 1: You can’t install macOS Monterey on your Mac.
Solution:
1) Check your available drive space to ensure it is over 5GB which is needed by the update. You can use Cleaner One Pro to free up more storage for the new operating system.
2) Still cannot install macOS Monterey? Please boot your Mac into Safe Mode (also called Single User mode):
- Restart Mac and immediately hold the Shift button.
- Reinstall macOS 12 Monterey when Mac boots into Safe Mode.
- Reboot your Mac.
Problem 2: Mac doesn’t turn on after installing macOS Monterey.
Solution:
1) Check your Mac’s hard drive with Disk Utility in macOS Recovery mode.
– Reboot Mac and immediately hold Command + R to boot into macOS Recovery mode.
– Release theses keys when you see the loading bar.
– Select Disk Utility from the macOS Utilities menu.
– Select the startup disk or the macOS volume in the left sidebar of Disk Utility.
– Click First Aid at the top center and click Run to repair this disk.
– When it’s finished, click on Done and restart your Mac as usual.
2) Downgrade macOS Monterey to Big Sur.
If you want to downgrade from Monterey to Big Sur, please refer to the following method:
- Connect your Time Machine backup disk where you have stored all the files before upgrading.
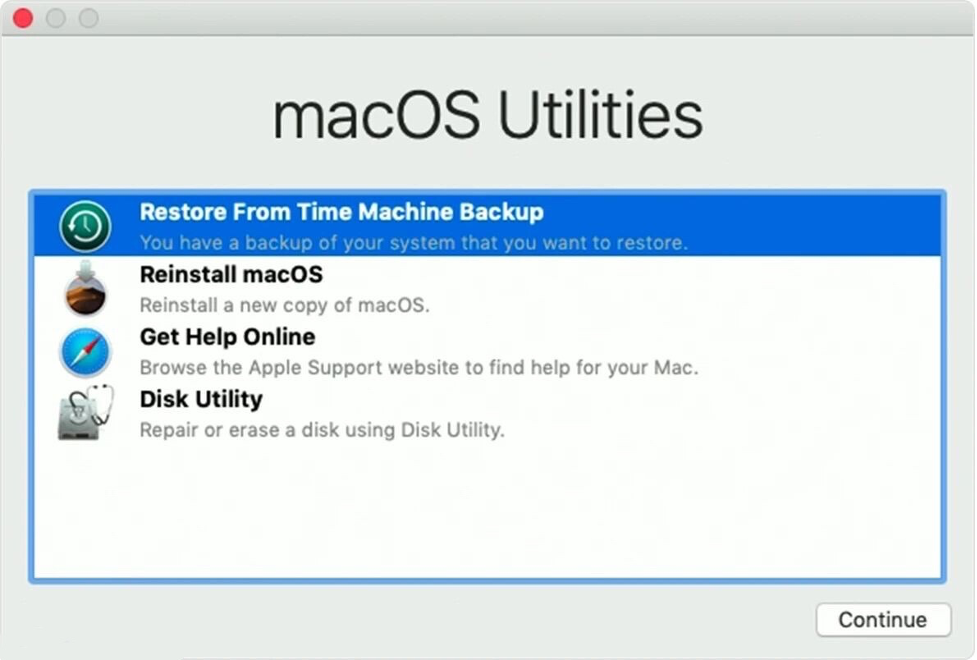
- Restart your Mac. Press and hold Command (⌘)-R to boot system from macOS. You can release the key when you see the Apple logo or the spinning globe. When the “macOS Utilities” window appears, select “Restore from Time Machine Backup“, and click Continue.
- The “Select a Restore Source” window appears and choose your Time Machine backup disk. Then select “Continue”.
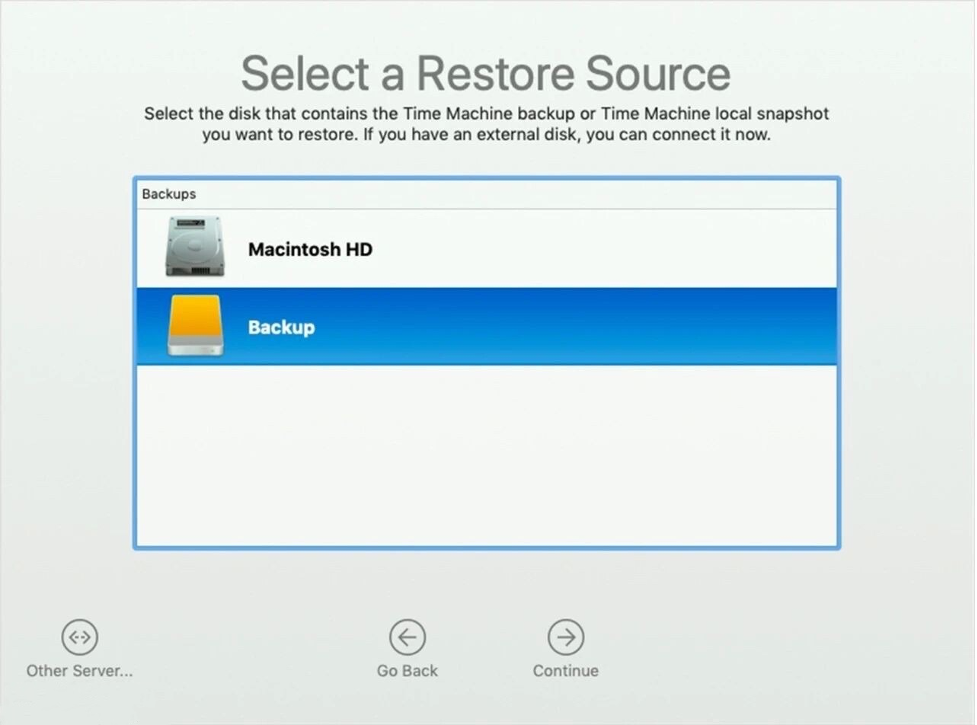
- Select a backup file and choose a destination disk for the backup system.
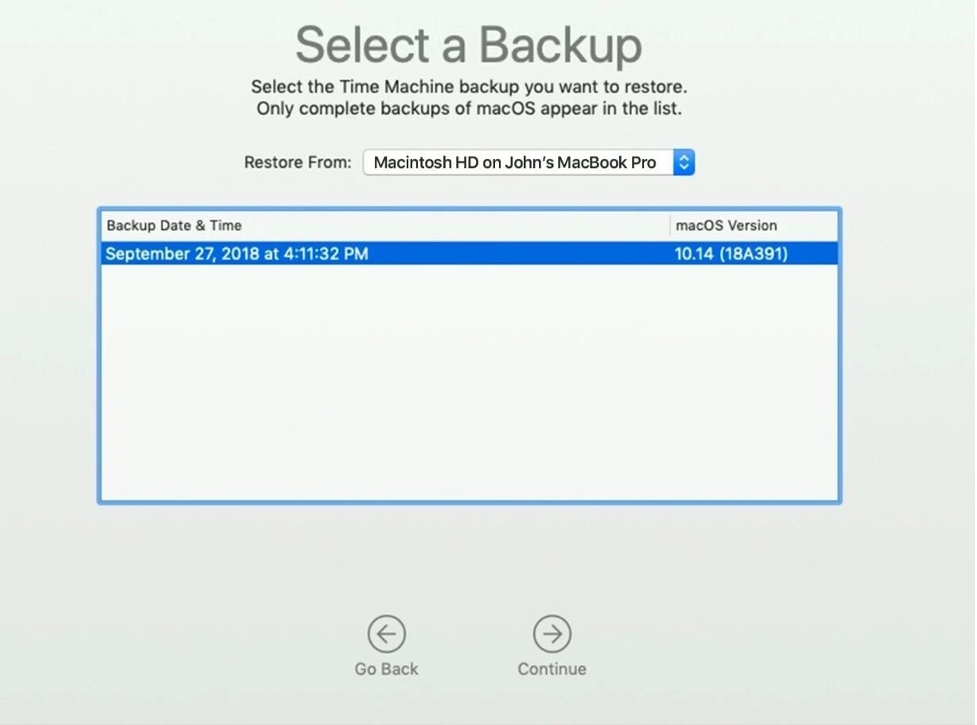
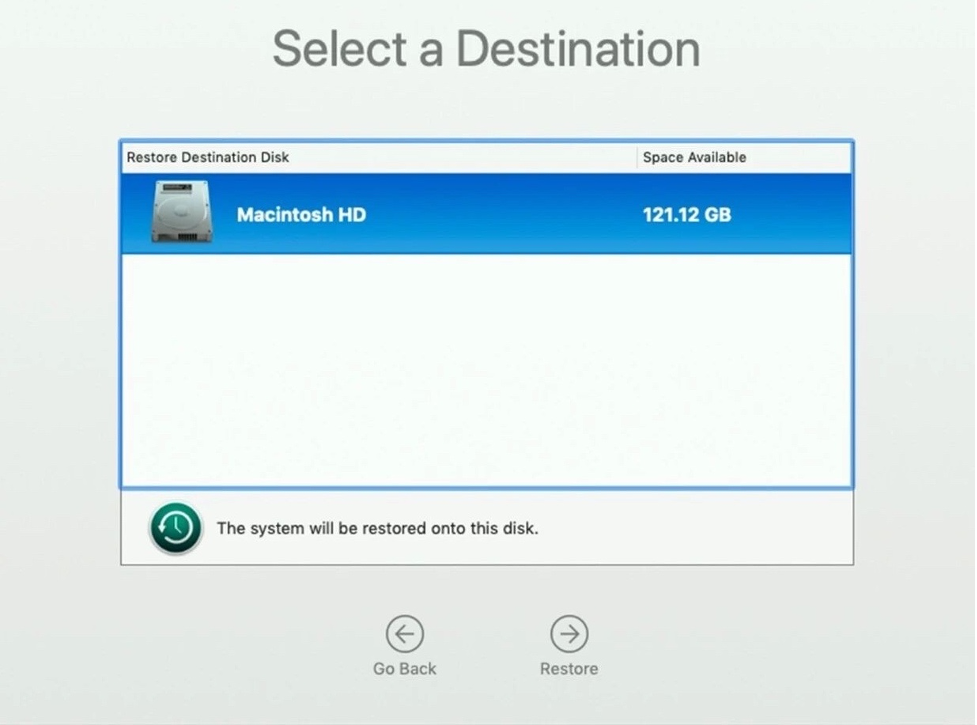
- The restoration begins which may take a few hours. Wait patiently for the macOS returning to Big Sur.
If you need more help, feel free to check the following article: How to fix the most common monterey update issues.

