Tired of cluttered applications on your Mac? Learn how to uninstall apps and programs like a pro and regain control of your digital space!
In this guide, we’ll show you how to uninstall apps and programs on your Mac efficiently and enjoyably.

I. Uninstalling Apps and Programs on Mac:
A. Built-in Uninstallation Methods:
Uninstalling apps and programs on your Mac doesn’t have to be a daunting task. With the built-in uninstallation methods at your disposal, you can bid farewell to unwanted software with ease and efficiency.
1.Uninstalling App Store Applications:
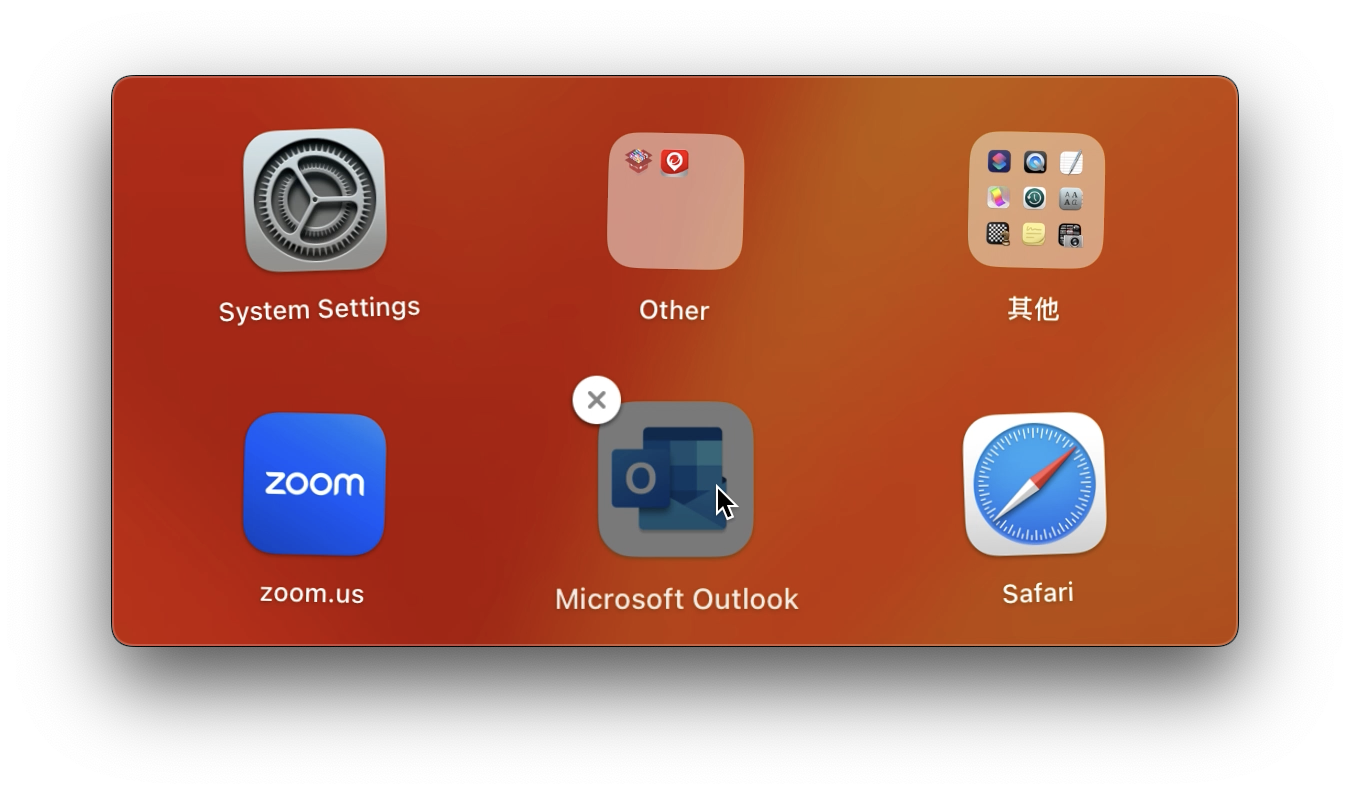
- Step 1: Open Launchpad and find the app you want to uninstall.
- Step 2: Click and hold the app until it starts wiggling.
- Step 3: Click the “X” button that appears on the app icon.
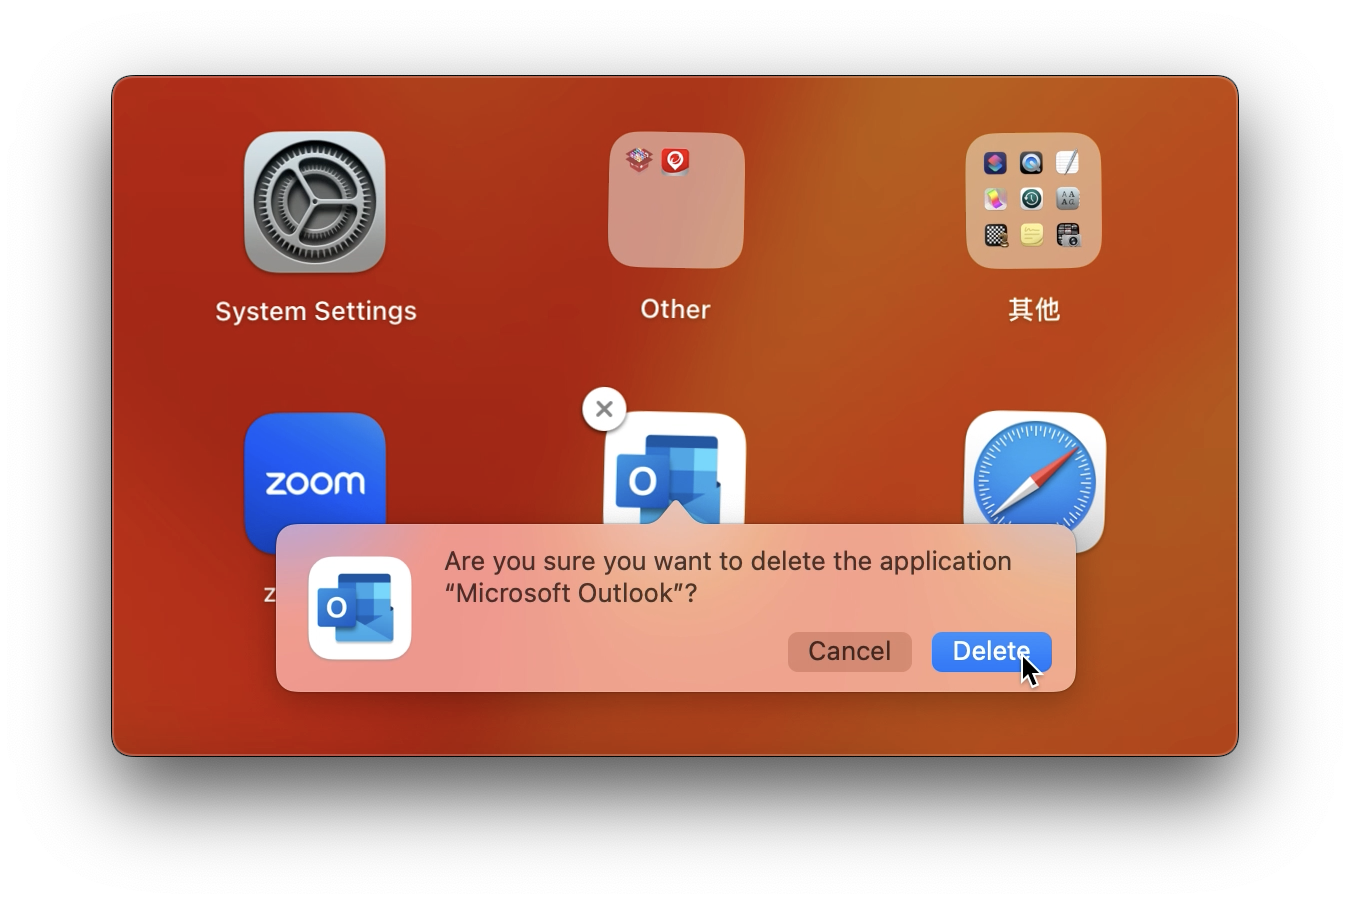
- Step 4: Confirm the uninstallation by clicking “Delete” in the pop-up window.
2.Uninstalling Non-App Store Applications:
- Step 1: Open Finder and go to the “Applications” folder in the sidebar.
- Step 2: Locate the app you want to uninstall.

- Step 3: Drag the app to the Trash icon in the Dock.
- Step 4: Right-click the Trash icon and select “Empty Trash” to permanently remove the app.
B. Third-Party Uninstaller: Cleaner One Pro
While the built-in uninstallation methods provided by macOS can get the job done, there is a whole world of third-party apps out there that offer a superior uninstallation experience. With advanced features, enhanced performance, and a user-friendly interface, third-party apps such as Cleaner One Pro take app removal to a whole new level.
- Step 1: Click and download Cleaner One Pro.
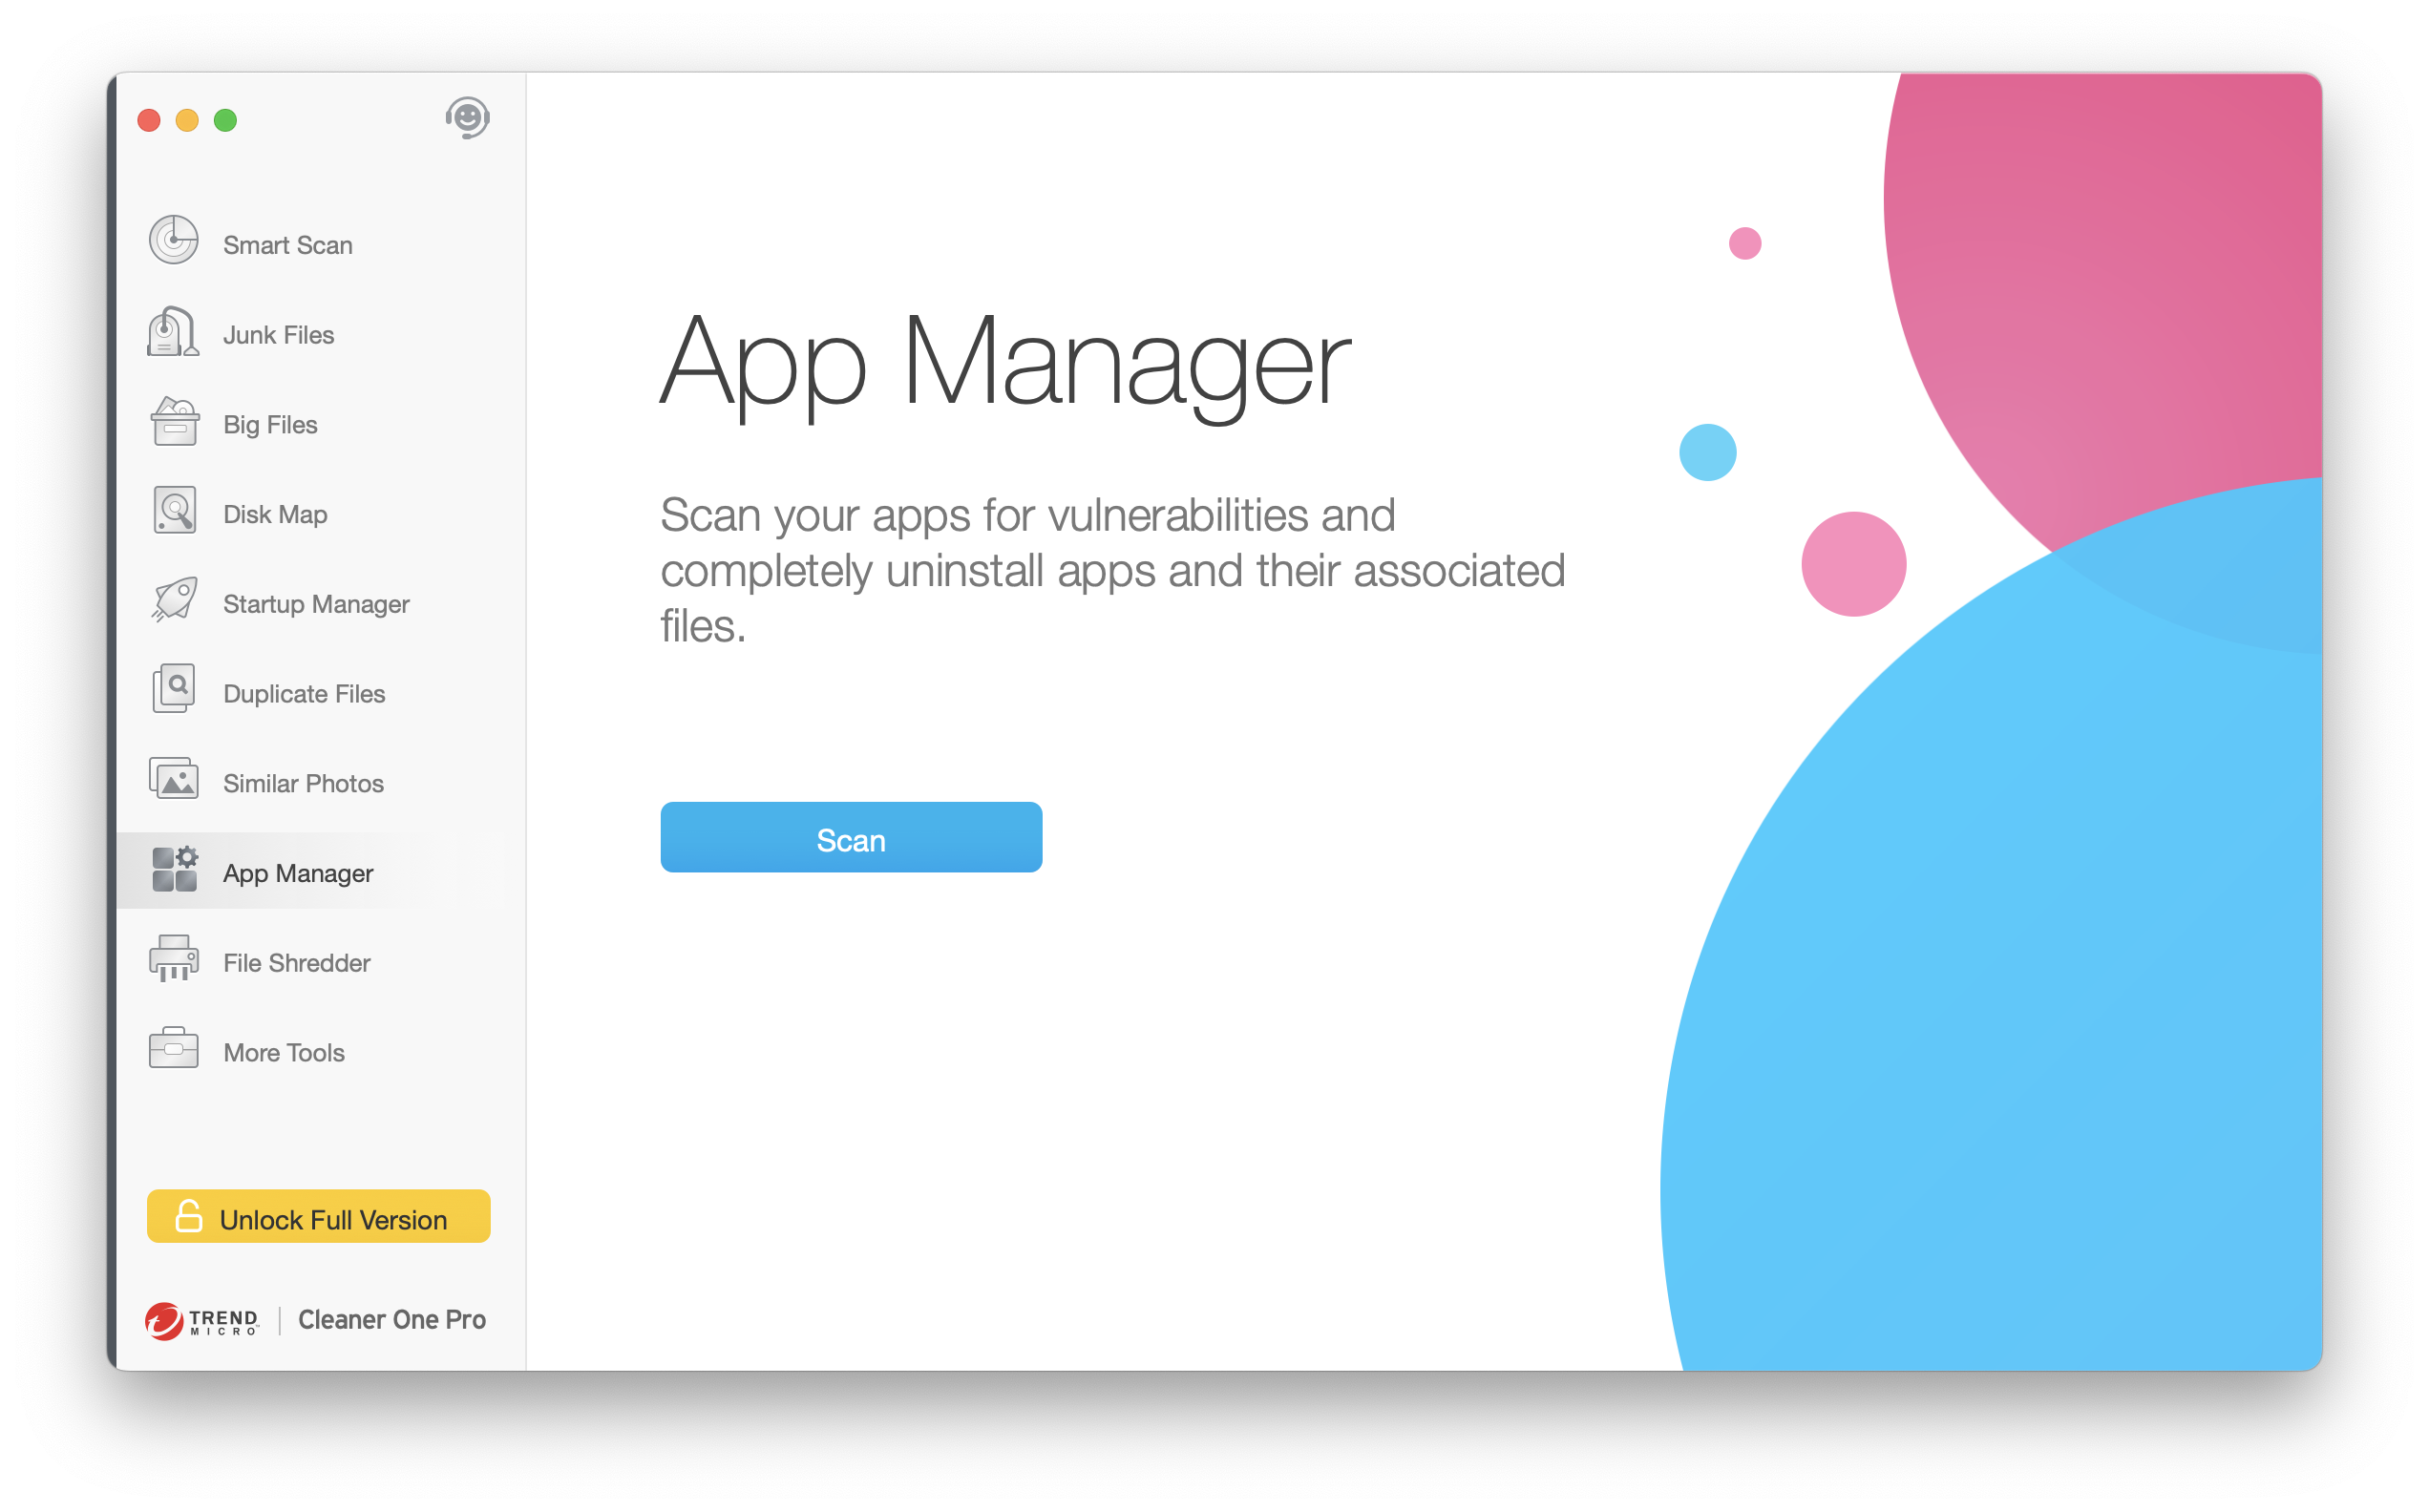
- Step 2: Launch the application and click on the “App Manager” tab in the sidebar.
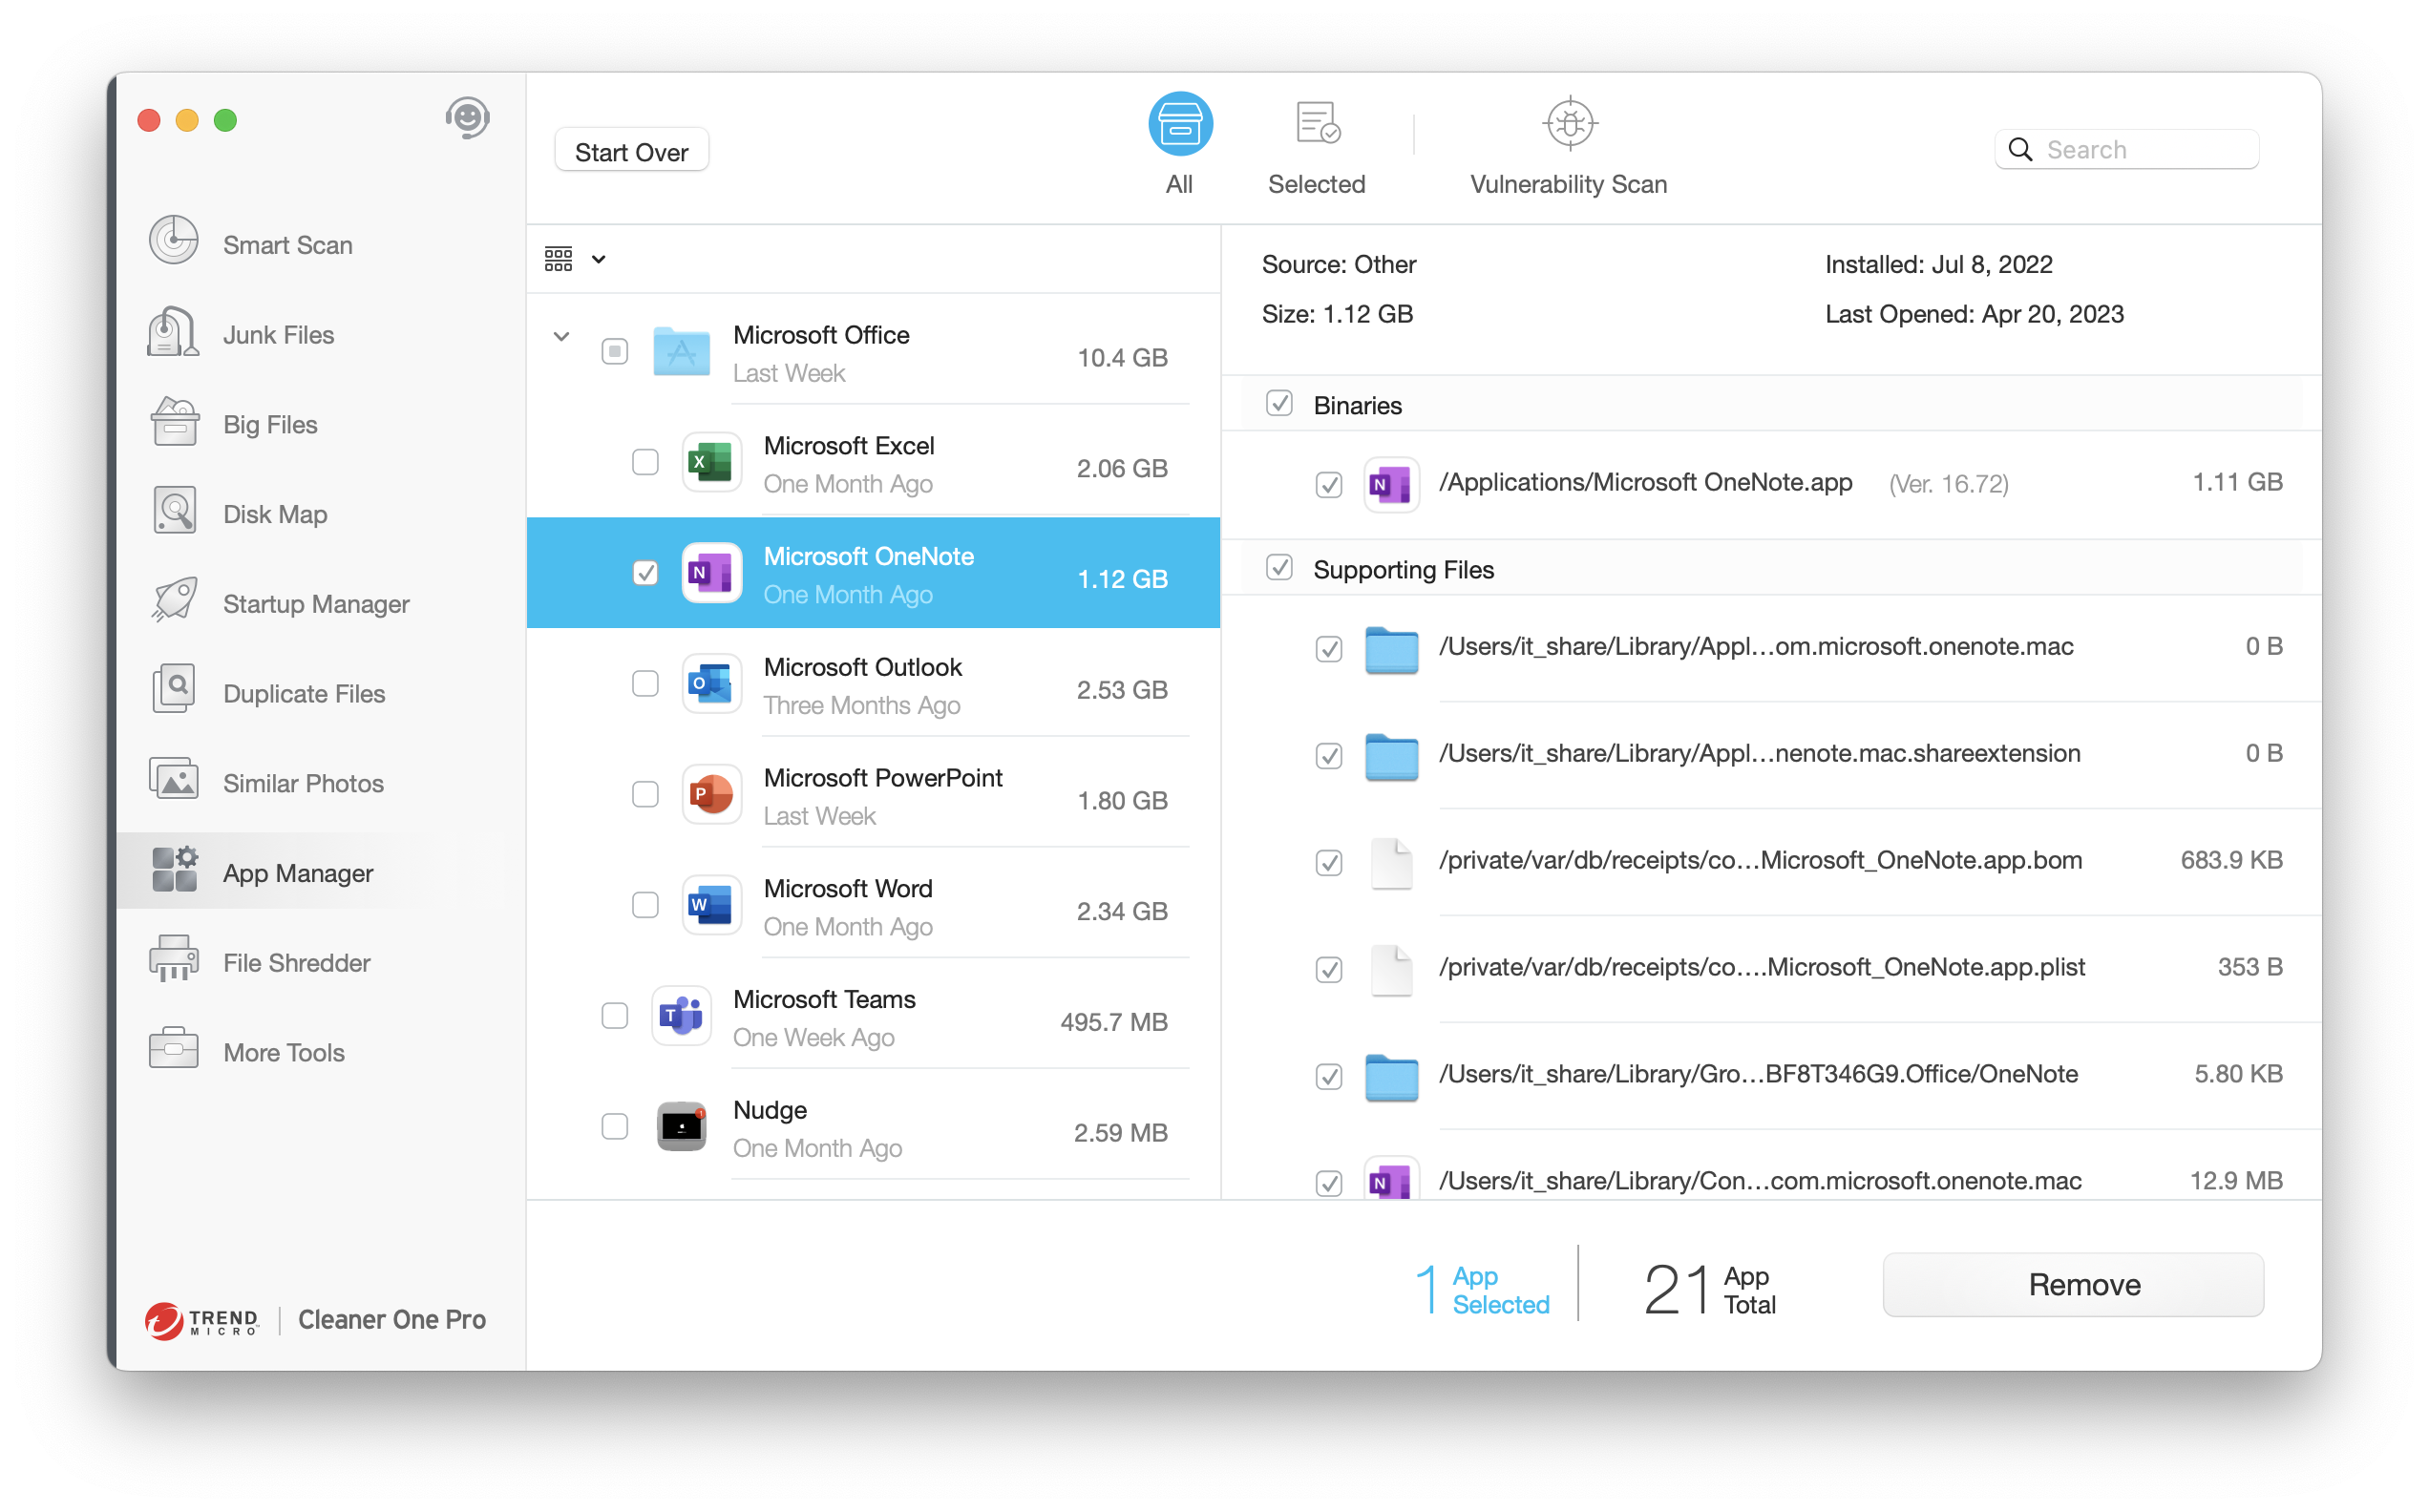
- Step 3: Select the app you want to uninstall and click the “Remove” button.
- Step 4: Confirm the uninstallation by clicking “Proceed“.
While the built-in uninstallation methods on macOS may appear simple and straightforward, they often leave behind residual files, preferences, and other clutter that can accumulate over time. This can not only take up valuable storage space but also impact your Mac’s overall performance. That’s where third-party apps come to the rescue, offering a more thorough and efficient uninstallation process.
II. Cleaning Up Residual Files:
After uninstalling an app, it’s essential to remove any residual files. Follow these steps:
A.Manual File Search:
- Step 1: Open Finder and click on “Go” in the menu bar.
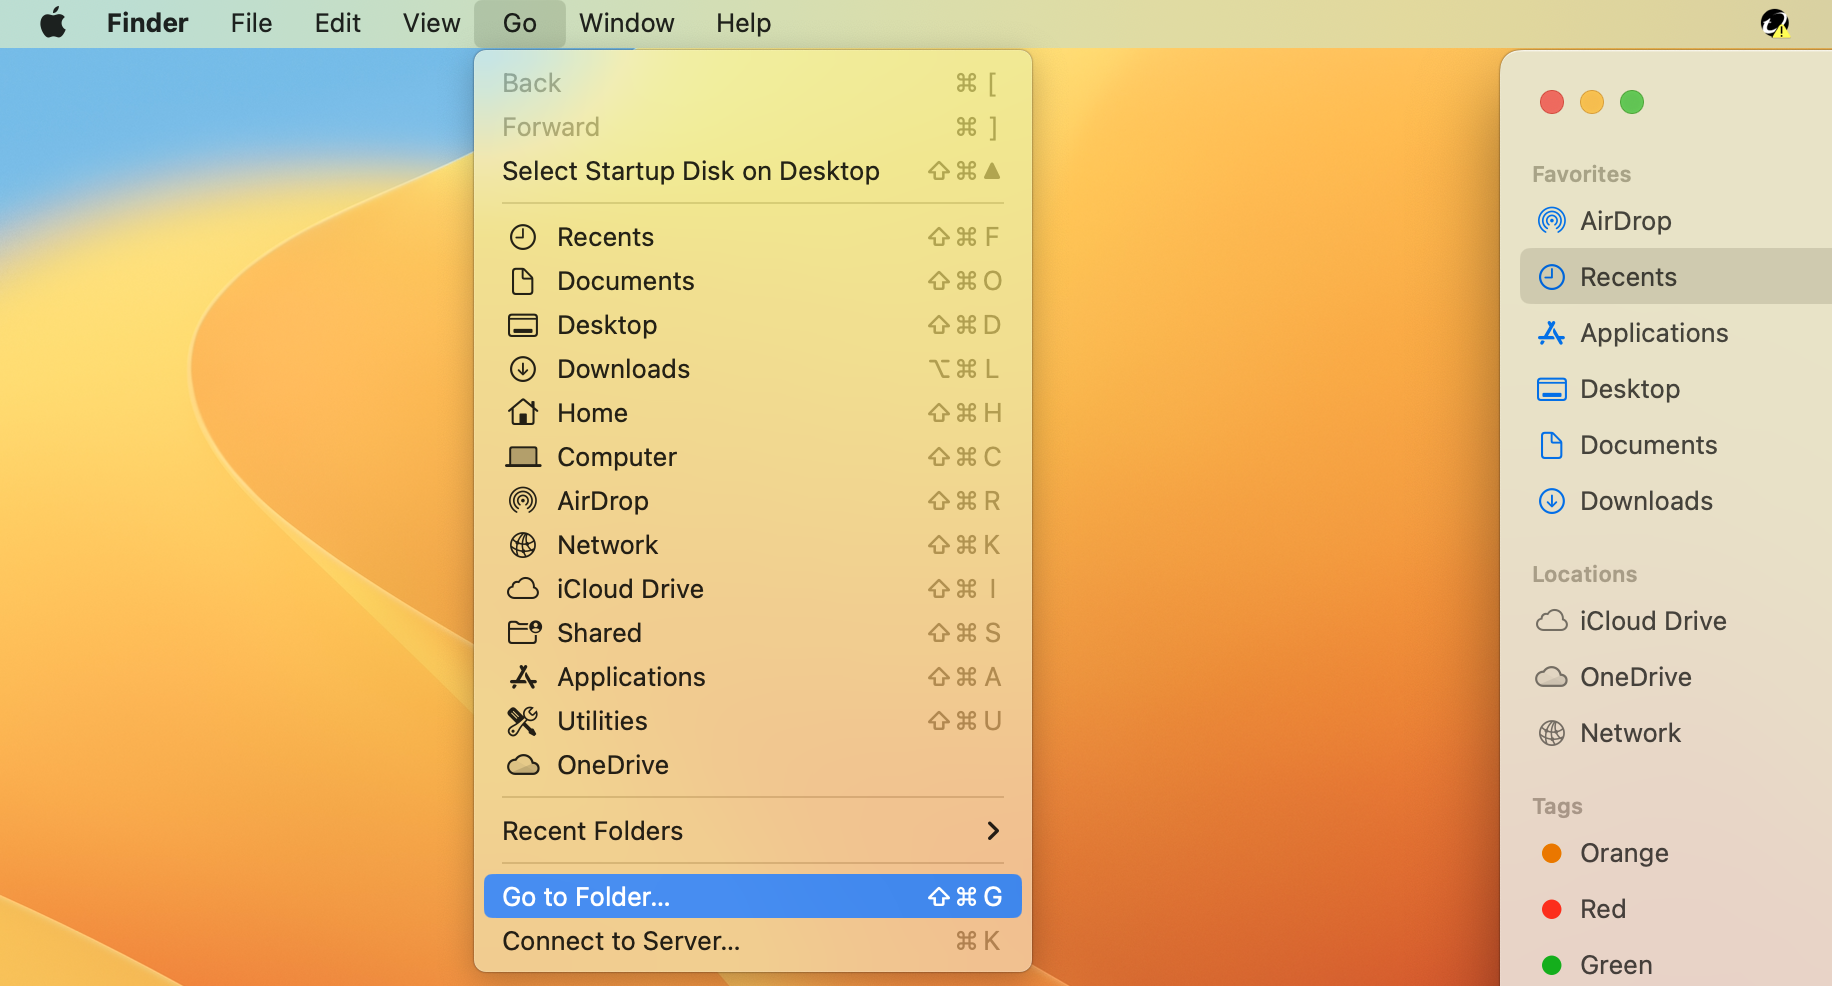
- Step 2: Select “Go to Folder” and enter “~/Library” to access the Library folder.
- Step 3: Search for files and folders related to the uninstalled app.
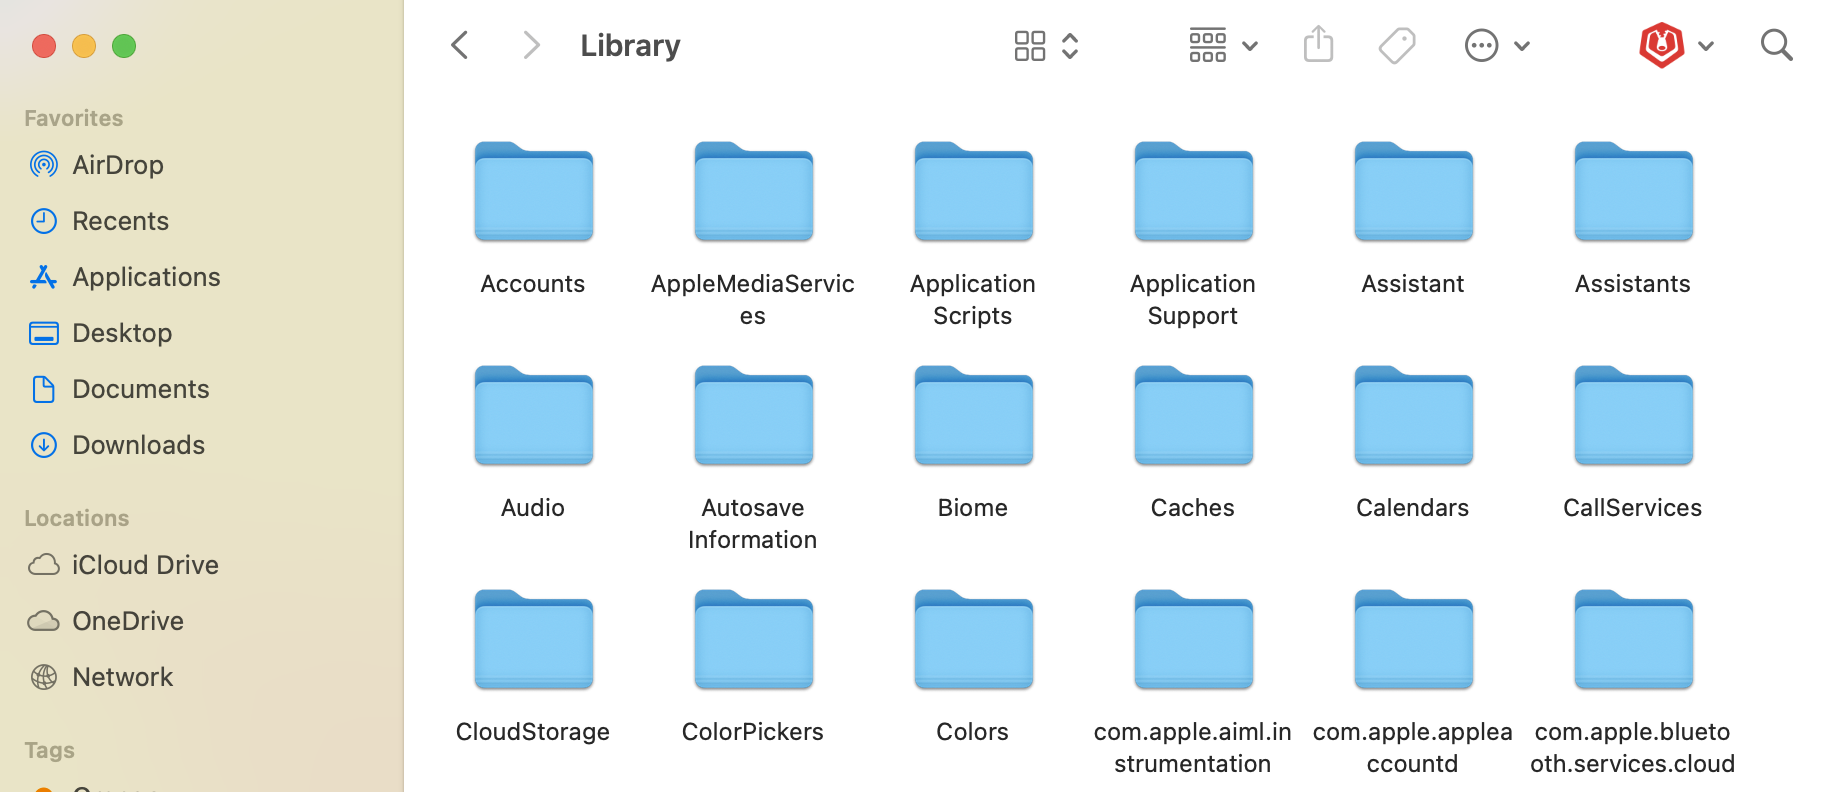
- Step 4: Drag the identified files and folders to the Trash and empty it.
Indeed, manual searching for associated files and folders can be a frustrating and time-consuming task.
Fortunately, third-party uninstaller apps offer a simple and efficient solution, saving you valuable time and effort while ensuring a clean and optimized Mac.
B.Dedicated Cleaning Applications:
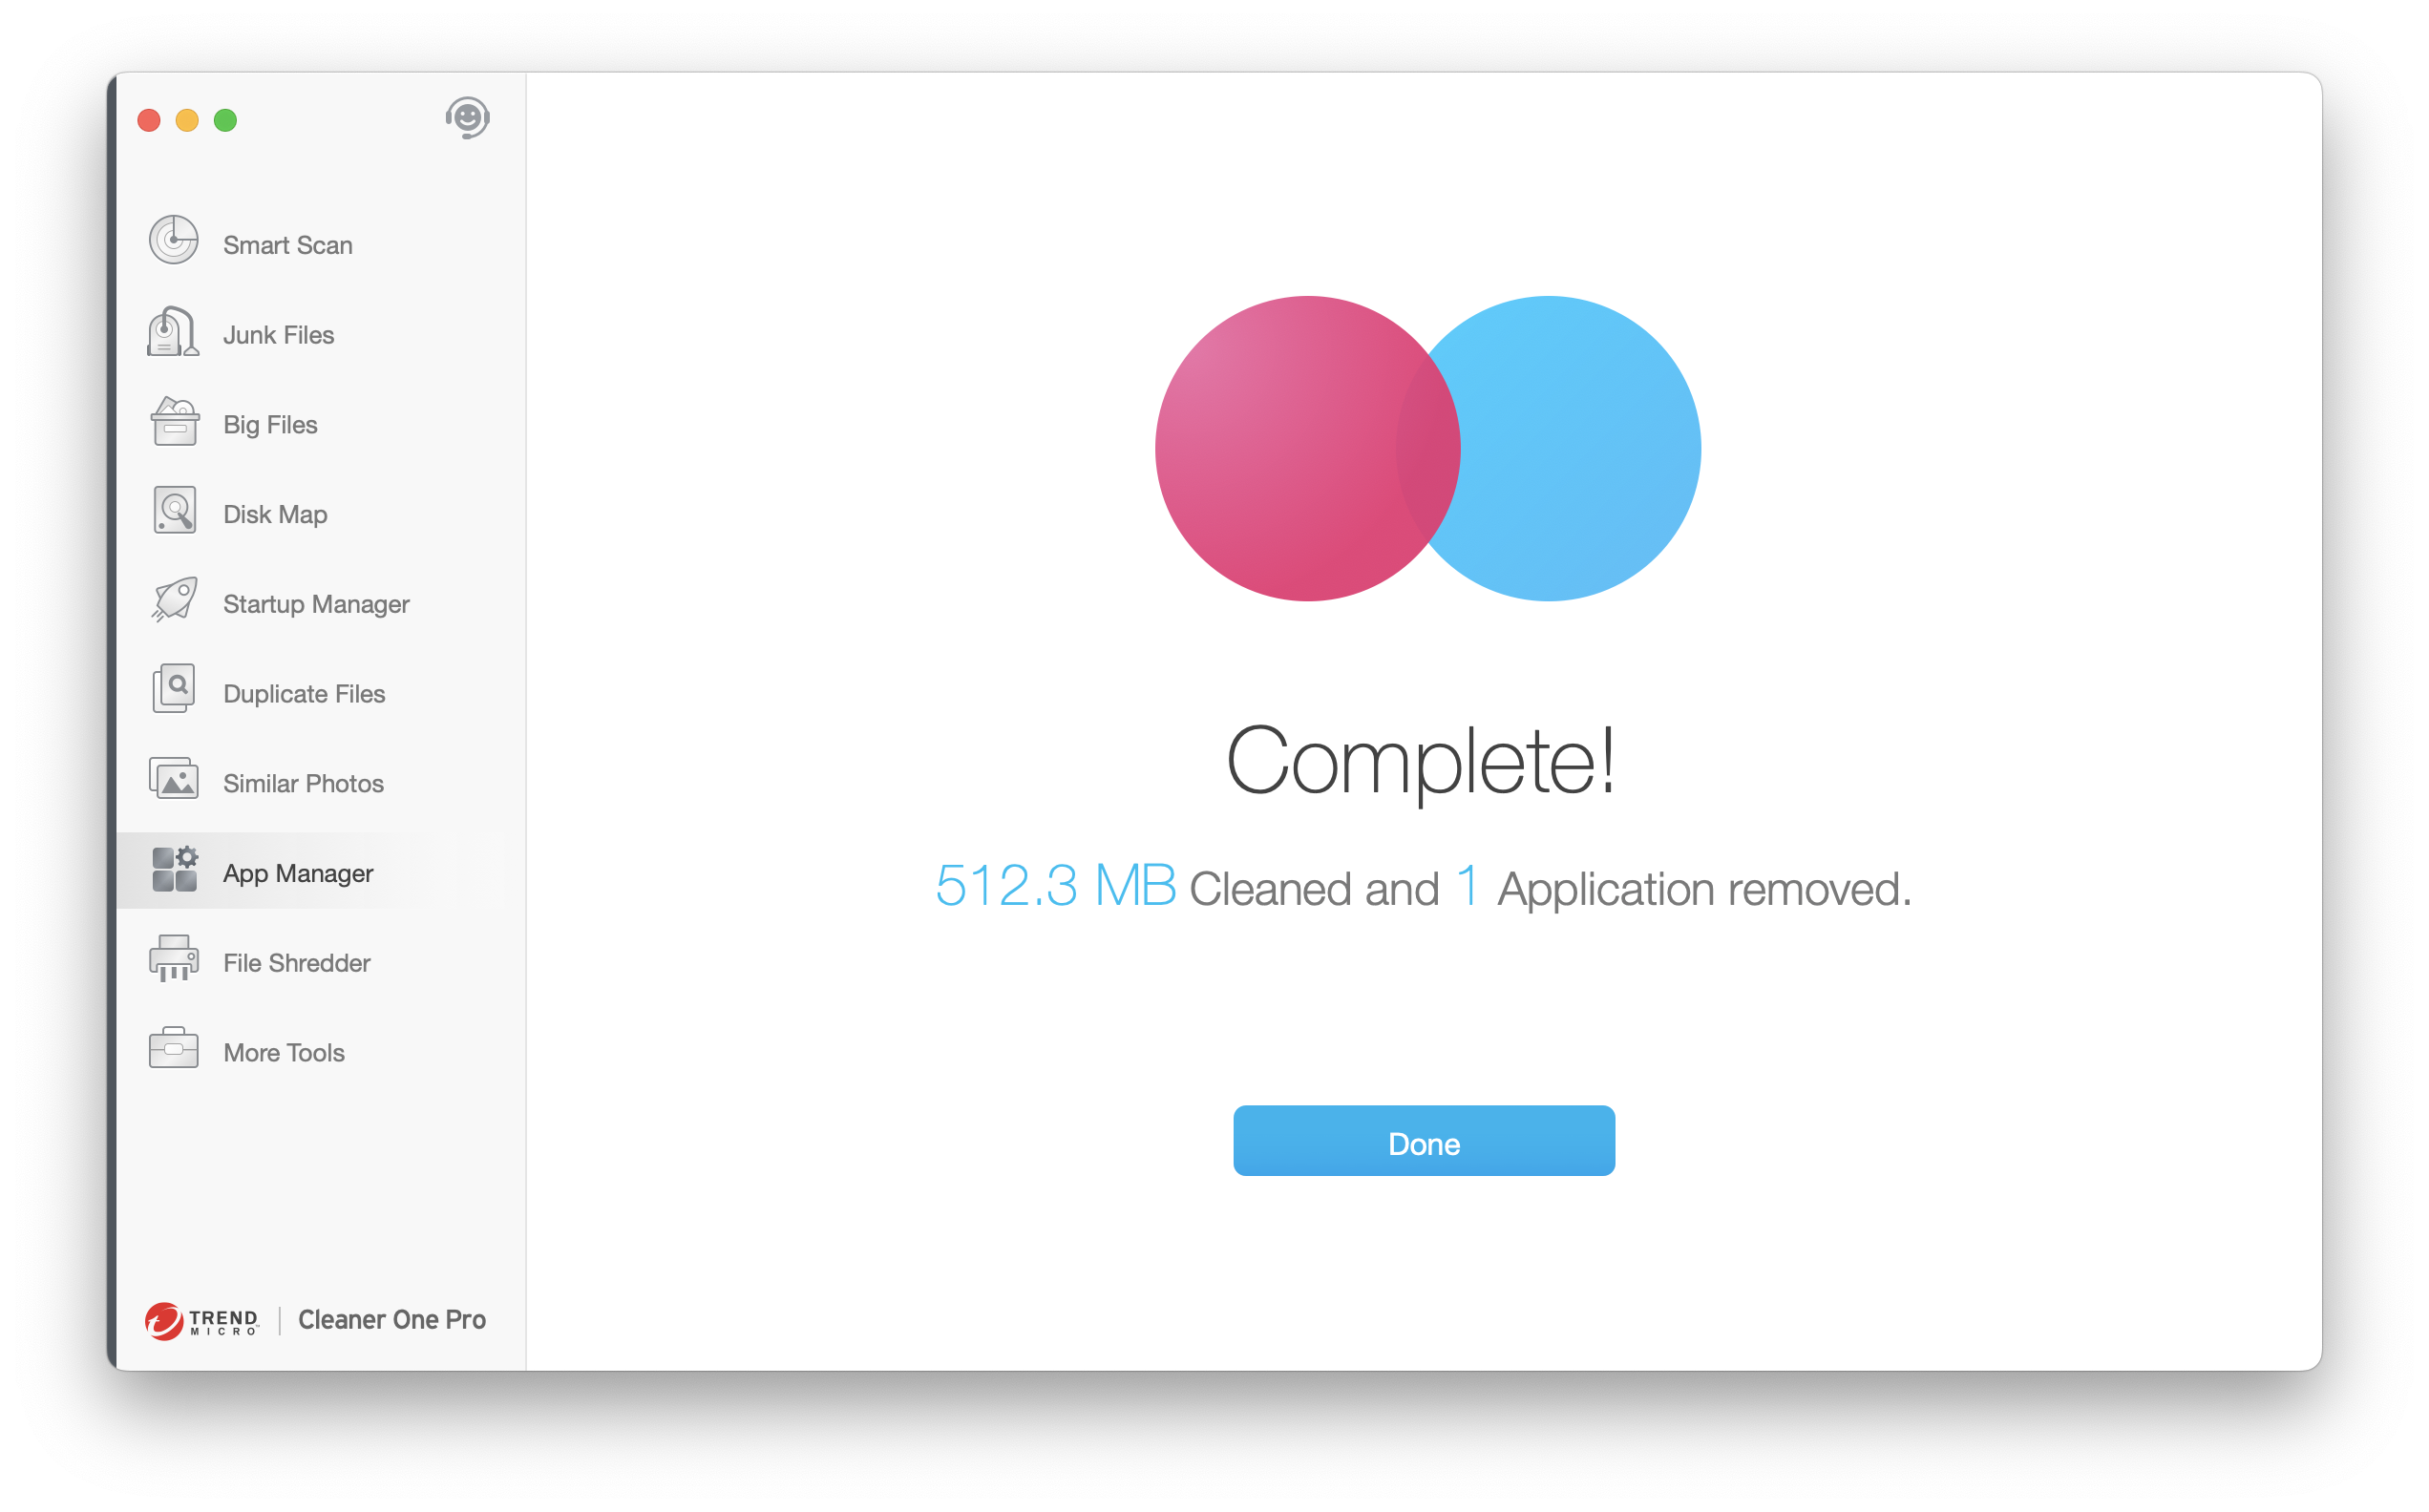
Cleaner One Pro is a reliable third-party cleaning application that can efficiently identify and remove residual files left behind by uninstalled apps. It simplifies the process and ensures a thorough cleanup, saving you time and effort.
Conclusion:
By following the steps outlined in this guide, even if you’re a beginner, you can effortlessly uninstall apps and programs on your Mac like a pro. Take control of your digital space, free up storage, and optimize your system’s performance.
Remember, whether you’re using built-in uninstallation methods or third-party uninstallers like Cleaner One Pro, always back up your important data and remove residual files for a complete cleanup. Embrace the joy of decluttering your Mac and revel in its improved performance! Happy uninstalling!

